How to record your voicemail greeting
GuestbookWedding plan and up
When a guest taps the voicemail button on your page, they hear a short greeting from you before the beep, just like calling a real phone. A greeting in your own voice makes guests far more likely to actually leave a message, because it tells them this is real, it’s you, and you want to hear from them.
Plan: Wedding plan and up · Where: Website hub → Guest Interactions → Voicemail
Before you start
- Voice messages must be enabled for your event. You’ll check the toggle in step 4.
- Find a quiet spot. You get 30 seconds, and one warm sentence is plenty: “Hi, you’ve reached Sam and Alex. Leave us a message we can replay for years.”
- Your browser will ask for microphone permission. Record on whichever device has the better mic. The editor works on your phone too.
Steps
-
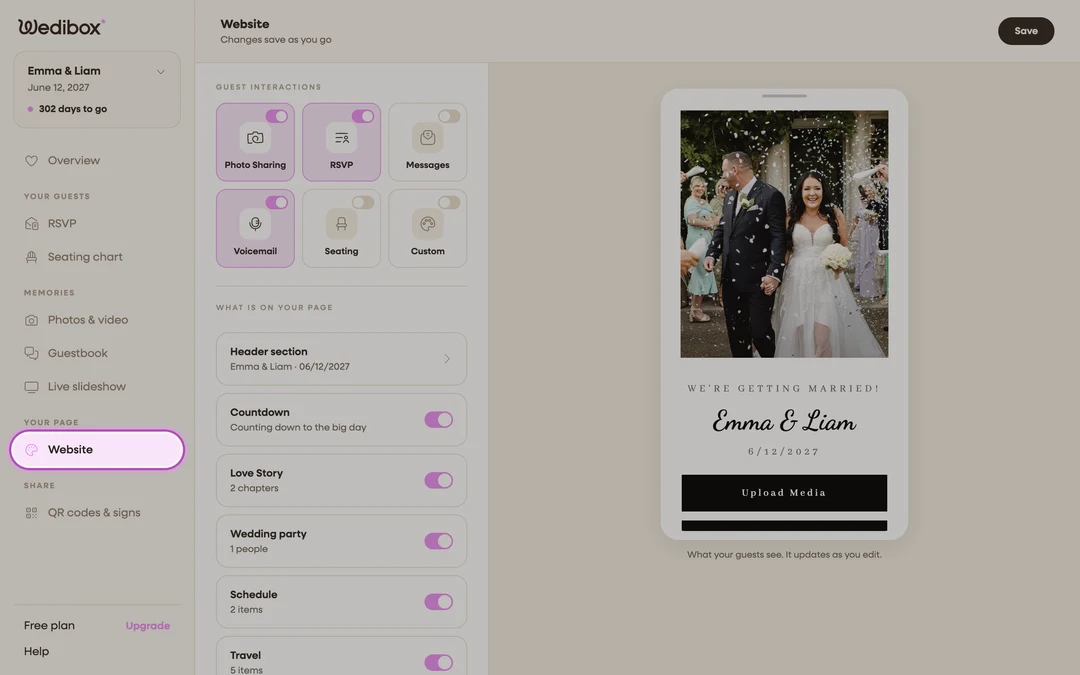
Open the Website hub. In the sidebar, click Website (under “Your page”). Everything guests see on your event page is edited from this one screen, next to a live preview of your page.
-
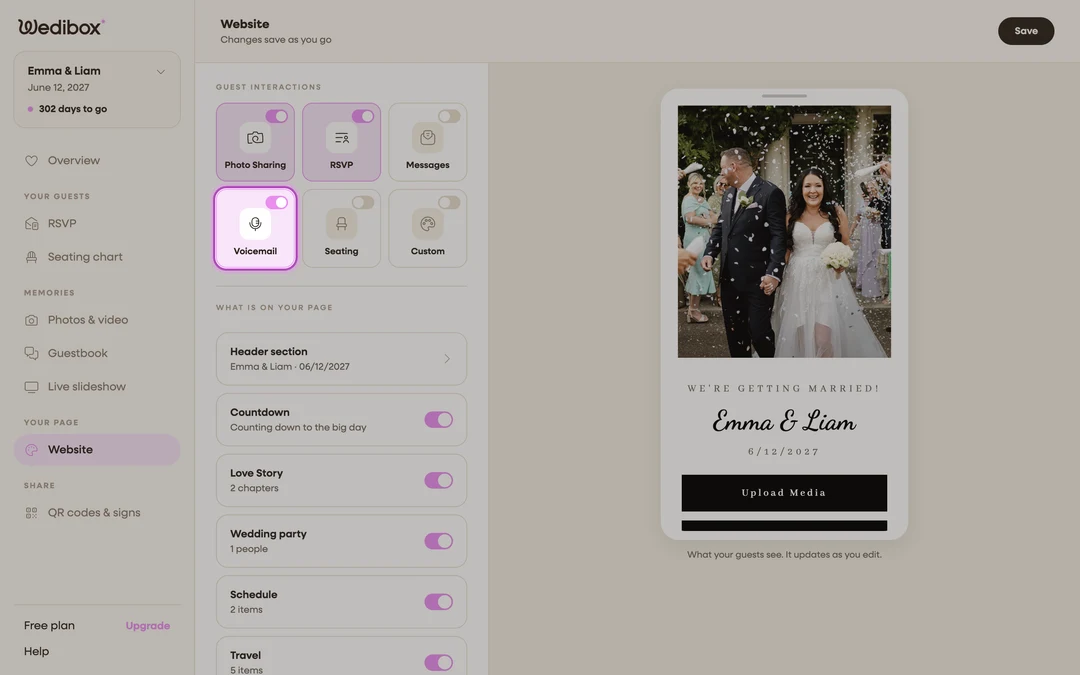
Find the Guest Interactions tiles. At the top of the editing panel, under Guest Interactions, there’s a tile for each way guests can take part: Photo Sharing, RSVP, Messages, Voicemail, Seating, Custom. The small switch on a tile turns that feature on or off; clicking the tile itself opens its settings.
-
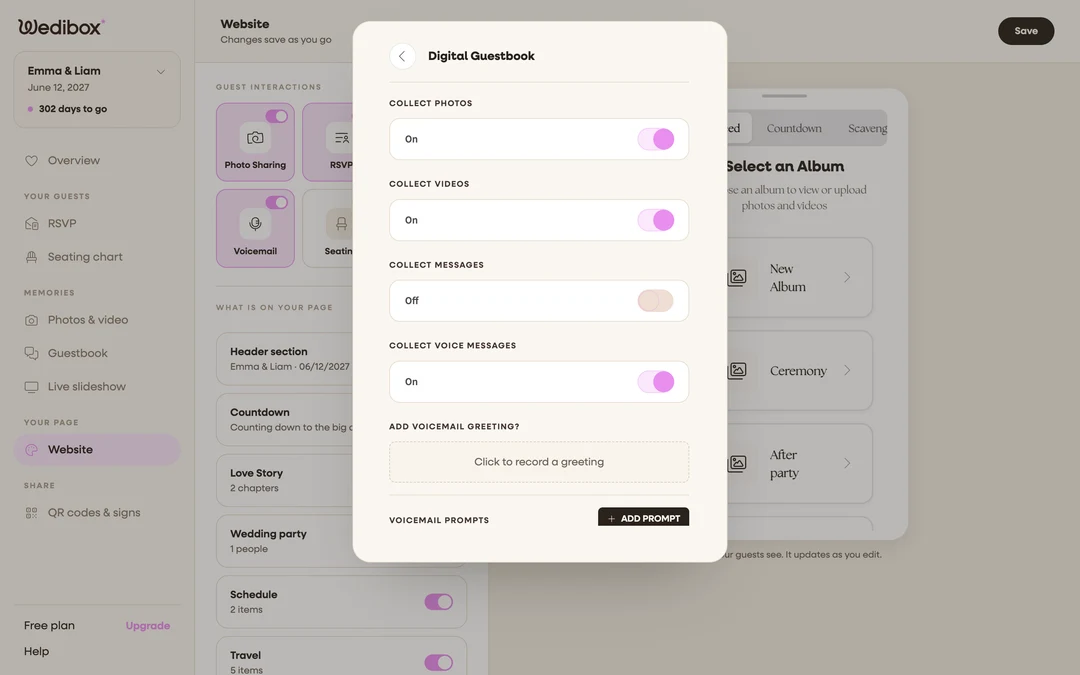
Click the Voicemail tile. The Digital Guestbook editor opens: photos, messages, and voicemails are collected by the same guestbook, so their settings live together here.
-
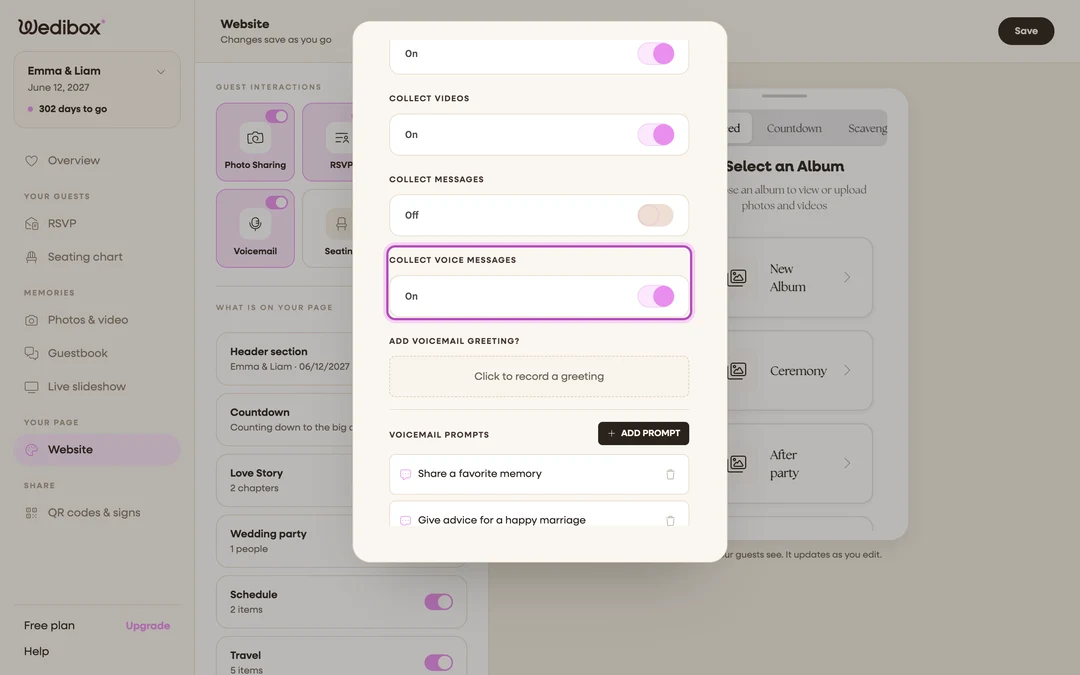
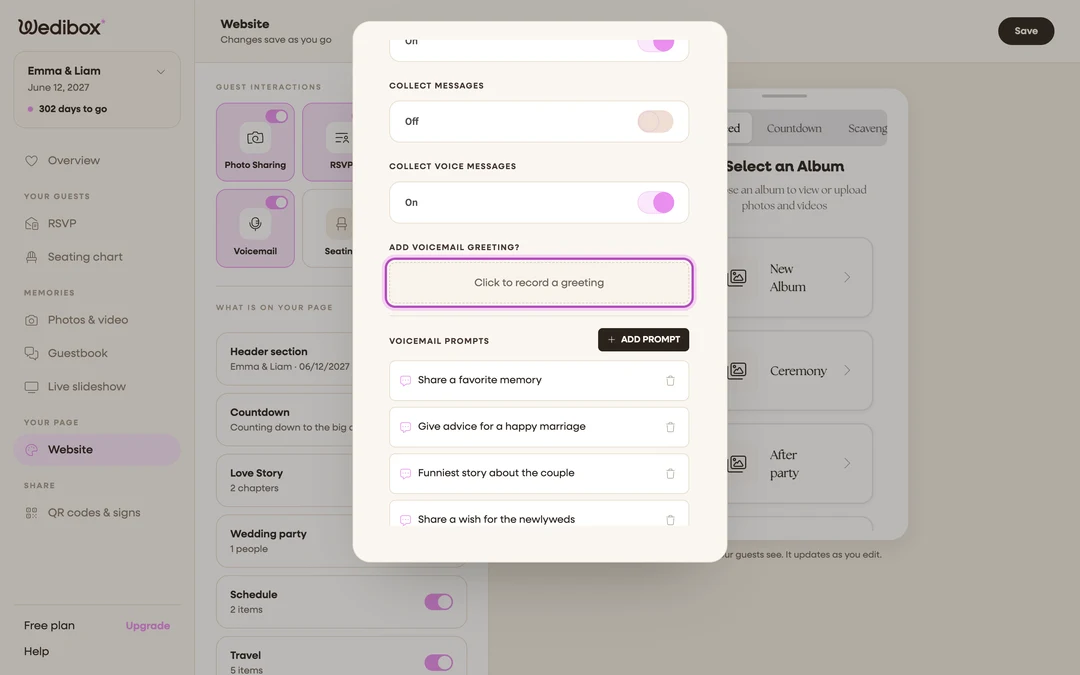
Make sure voice messages are on. Check that the COLLECT VOICE MESSAGES toggle is enabled. Your greeting only plays when guests can actually record voicemails.
-
Start a greeting. Under ADD VOICEMAIL GREETING?, click Click to record a greeting. The Set Voicemail Greeting panel opens.
-
Optional: hear real examples. Under Hear what other couples said, play a sample or two if you’re not sure what to say. Keep it short and warm. Guests are standing at your reception when they hear it.
-
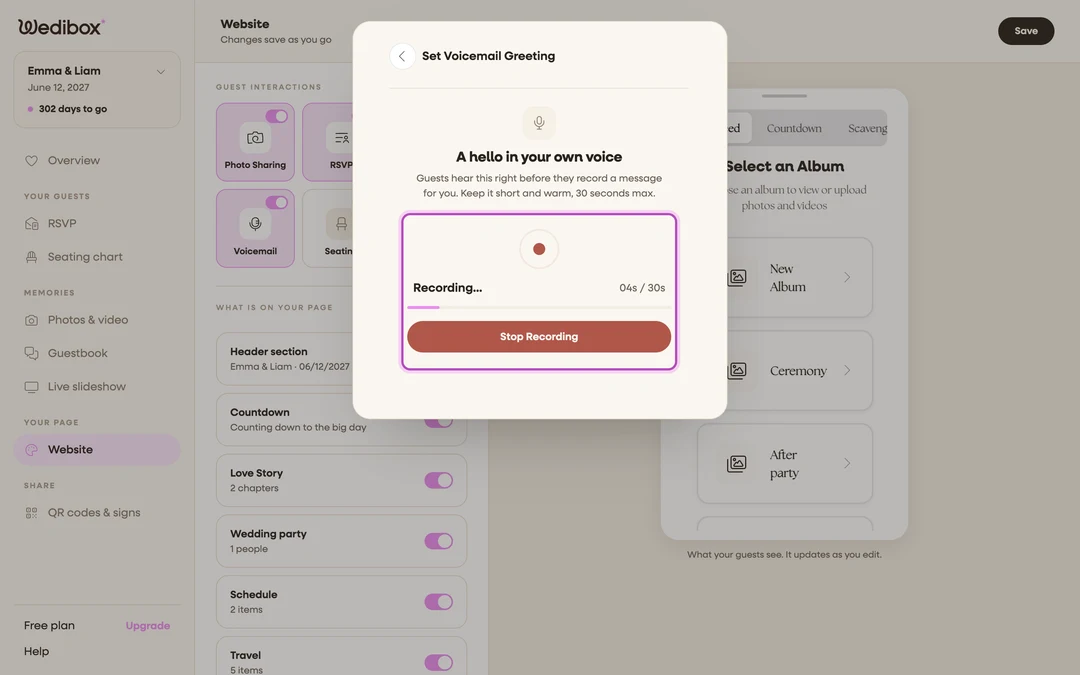
Record. Click Record Audio Message and allow microphone access if your browser asks. A timer counts up to the 30-second limit; click Stop Recording when you’re done. Already have a recording? Click Upload Instead and pick the audio file.
-
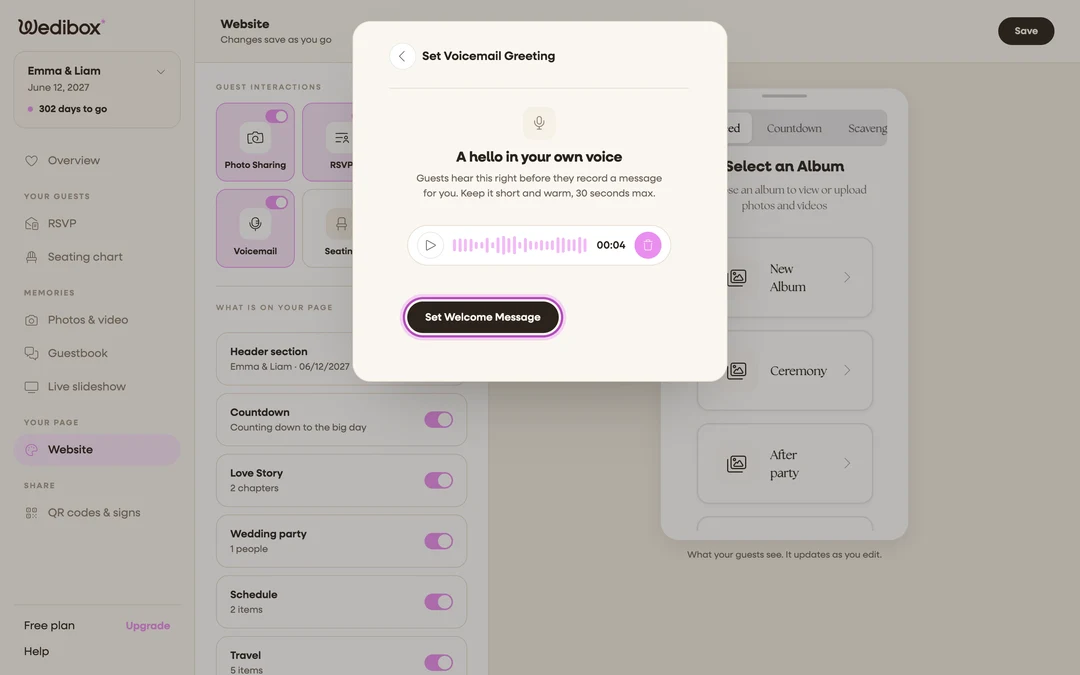
Listen back. Press the play button to hear your take. Not happy? Click the trash icon and record again. Takes are free.
-
Save it. Click Set Welcome Message. That’s the button that makes this greeting live for guests.
What you should see
Back in the Digital Guestbook panel, your greeting appears as a small audio player with a Replace Greeting button under it. From now on, every guest who taps the voicemail button hears your voice before the beep. Do one test yourself from your live page. It’s the fastest way to feel what guests will feel.
If something goes wrong
- “Could not access microphone. Please allow microphone permissions.”: your browser blocked the mic. Click the camera/mic icon in the address bar, allow access, and try again.
- You want a different greeting later: open the same panel and click Replace Greeting, or remove it with Remove Existing inside the greeting panel. Guests without a custom greeting hear a standard tone instead.