How to customize your header: names, date, and cover photo
Wedding websiteAll plans
The header is the first thing every guest sees: your photo, your names, your date, and the buttons that lead to everything else; RSVP, photo upload, voicemail, and more. Getting it right takes five minutes and makes the whole page feel like yours.
Plan: All plans · Where: Website editor → What is on your page → Header section
Before you start
- Pick a cover photo you love; engagement shoots work beautifully. Image files up to 30 MB are accepted.
- Your names and date from event setup are already filled in; you’re polishing, not starting from scratch.
Steps
-
Open the Website editor. In the sidebar, click Website (under “Your page”).
-
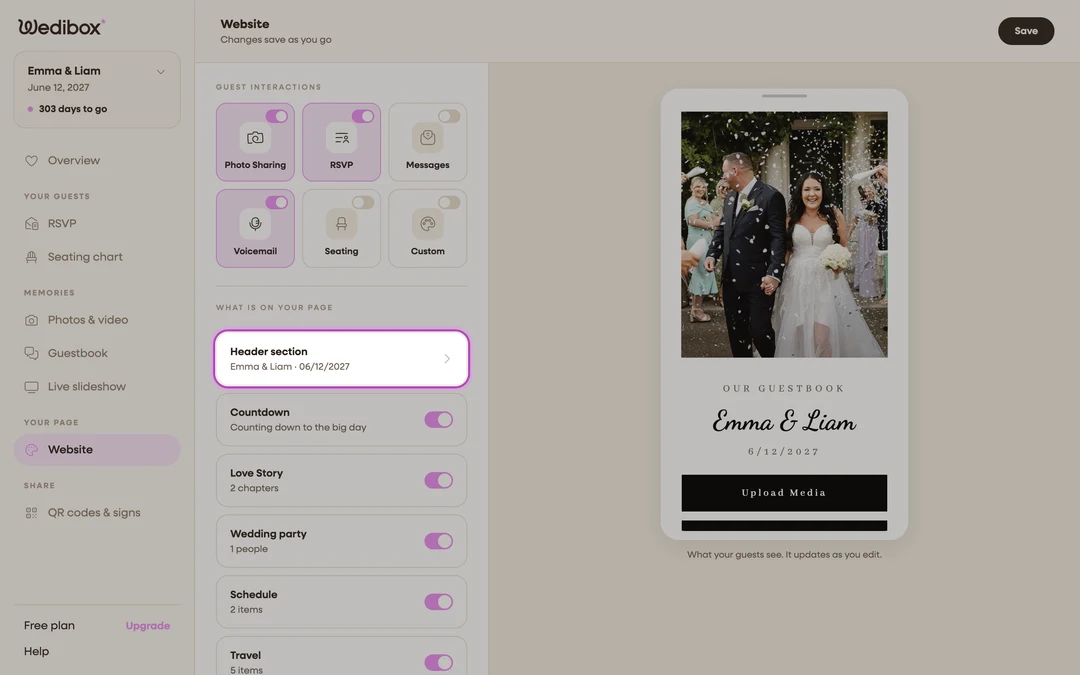
Open the header editor. At the top of What is on your page, click the Header section card; the line under it shows your current names and date.
-
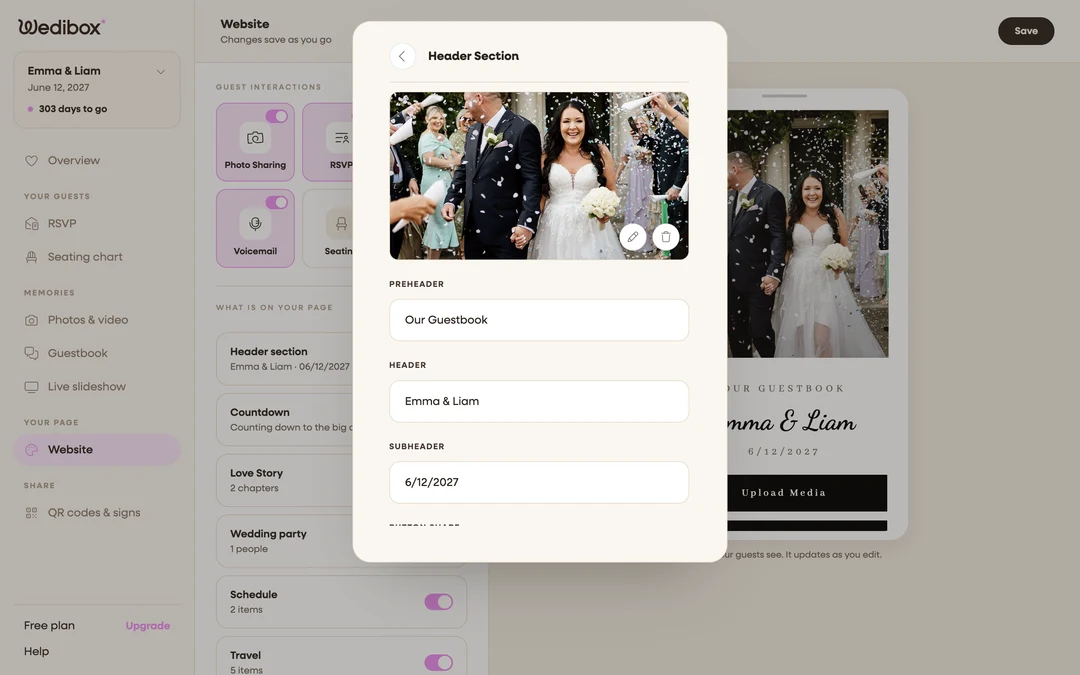
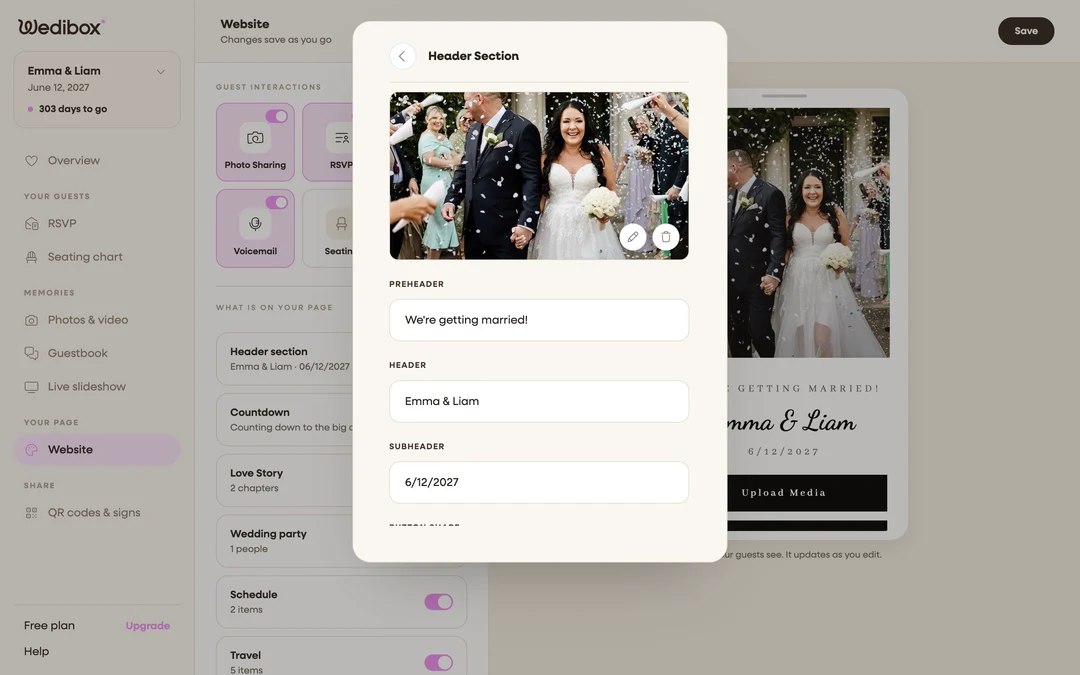
Set your cover photo. In the Header Section editor, click the pencil icon on the image to upload a new photo, or the trash icon to remove it. The preview swaps it in immediately.
-
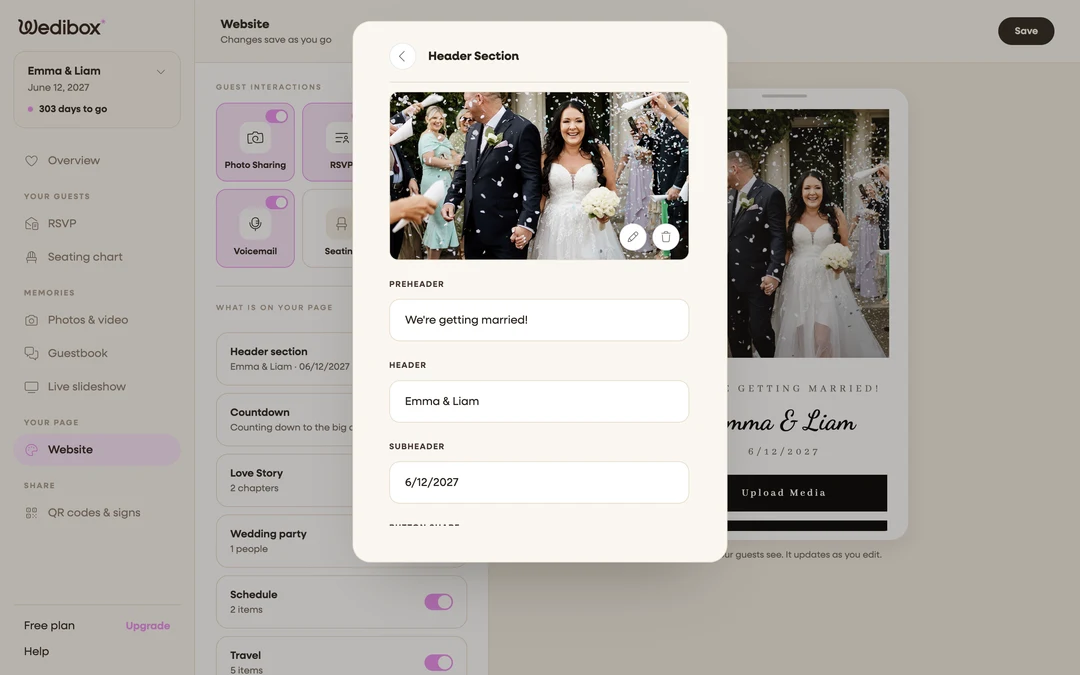
Write your three text lines. PREHEADER is the small line above your names (“We’re getting married”), HEADER is your names, and SUBHEADER usually holds the date or venue. Short lines look best on phones; that’s how most guests arrive.
-
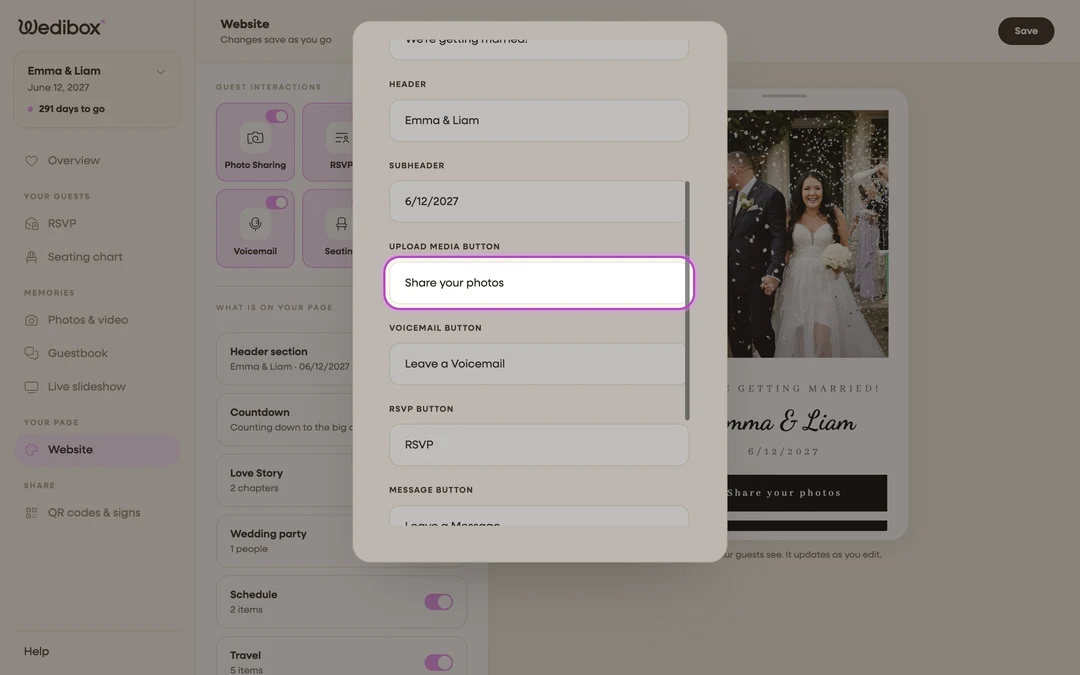
Rename your buttons. Below the text lines, each header button you’ve switched on gets its own field; UPLOAD MEDIA BUTTON, RSVP BUTTON, and so on. Type over the default (“Upload Media” could become “Share your photos”). Leave a field empty and the button falls back to its standard name, so it never shows up blank.
-
Choose your button shape. Set BUTTON SHAPE to Round or Square ; this styles every action button on the page.
-
Close the editor. Click the back arrow or the X; your changes save when the editor closes.
-
Pick your action buttons. Back on the main panel, the tiles at the top of the editor control the header buttons. Switch on any of the six: Photo Sharing (adds an “Upload Media” button), RSVP, Messages (“Leave a Message”), Voicemail (“Leave a Voicemail”), Seating (“Find Your Seat”), and Custom.
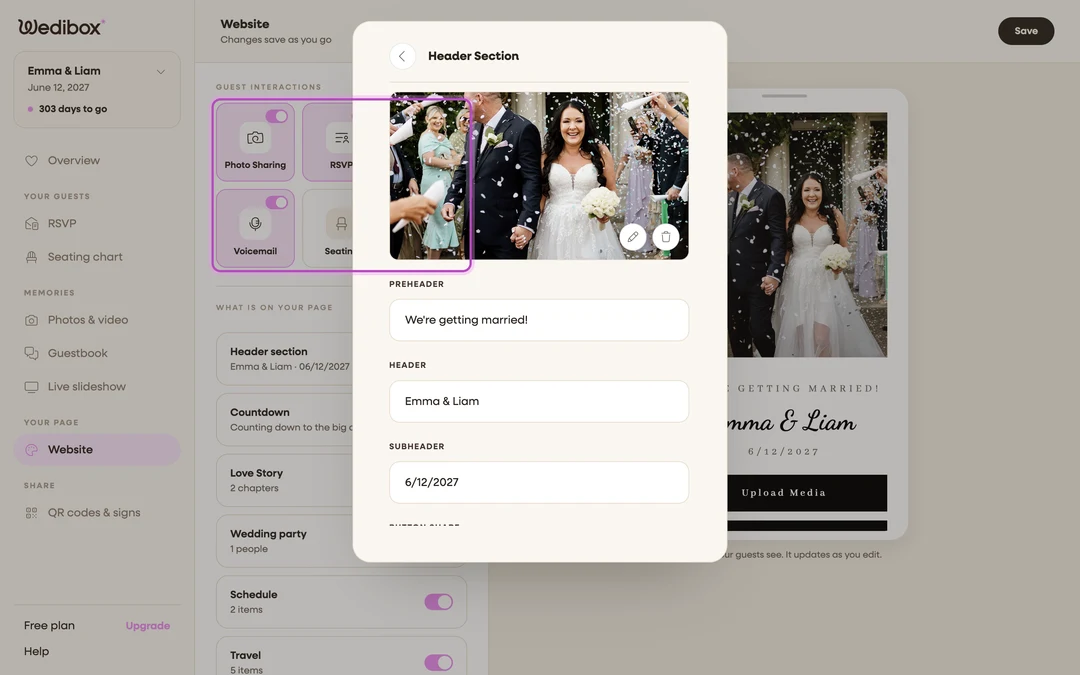
-
Optional: set up the custom button. Switch on Custom and two fields appear below the tiles; Button text and Link URL. Use it to link anywhere: your registry, a livestream, a hotel block.
What you should see
The preview shows your photo with your names over it and a row of buttons underneath ; and your live page matches. Buttons appear only for switched-on features, so guests never hit a dead end.
If something goes wrong
- “Image size must be less than 30MB”. Export a smaller version of the photo and upload again; screenshots of photos also work in a pinch.
- “This template only allows one button.”. The design you picked is a single-button layout. Keep just your most important button, or switch designs in Theme and colors.