How to make a wedding seating chart online
Seating chartAll-in-One plan
Wedibox’s seating chart is a floor-plan canvas: you place tables the way the room is actually laid out, then drag guest names onto chairs. Everything saves as you go, and when you’re done, guests can look up their seat by name. No easel calligraphy required.
Plan: All-in-One plan · Where: Sidebar → Seating chart
Before you start
- Use a laptop if you can. Moving tables around the canvas is desktop-only; on a phone you can still edit tables and seat guests from a list view.
- You can build charts on any plan. If you’re not on All-in-One yet, the page shows an Editor mode banner and guest seat lookup stays locked until you upgrade. Nothing you build is lost.
- Have your guest names ready. If you’ve already built a guest list in RSVP, those names appear here automatically (declined guests are left out).
- Not sure who sits where yet? The wedding seating chart guide on the blog covers when to start and how to group guests before you open the tool.
Steps
-
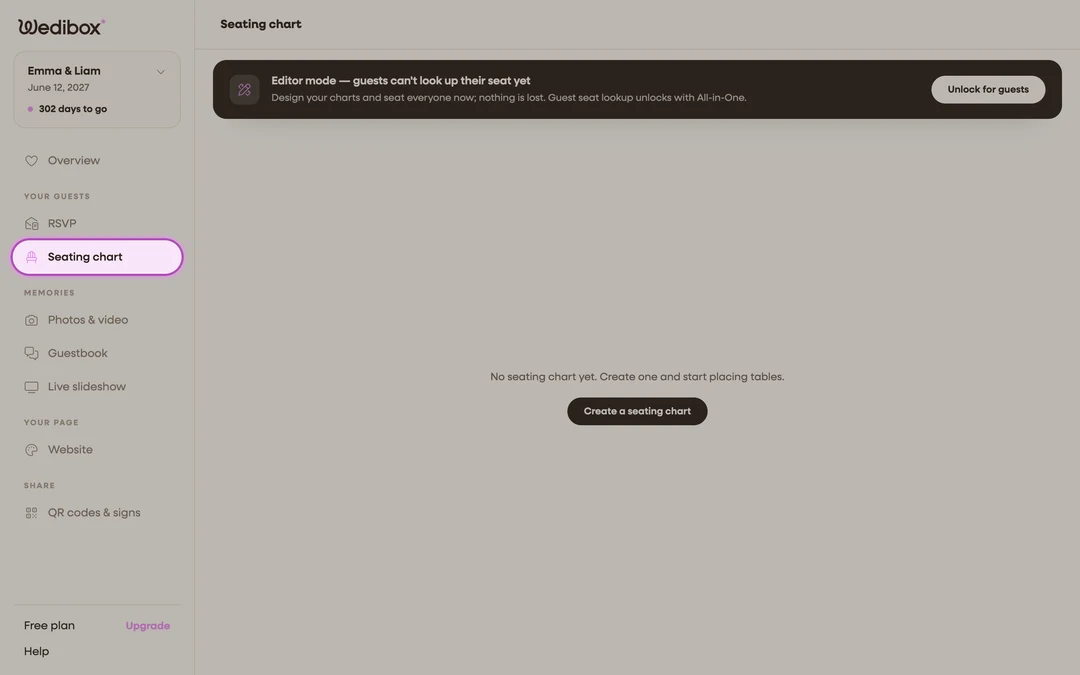
Open the seating chart. In the sidebar under “Your guests”, click Seating chart.
-
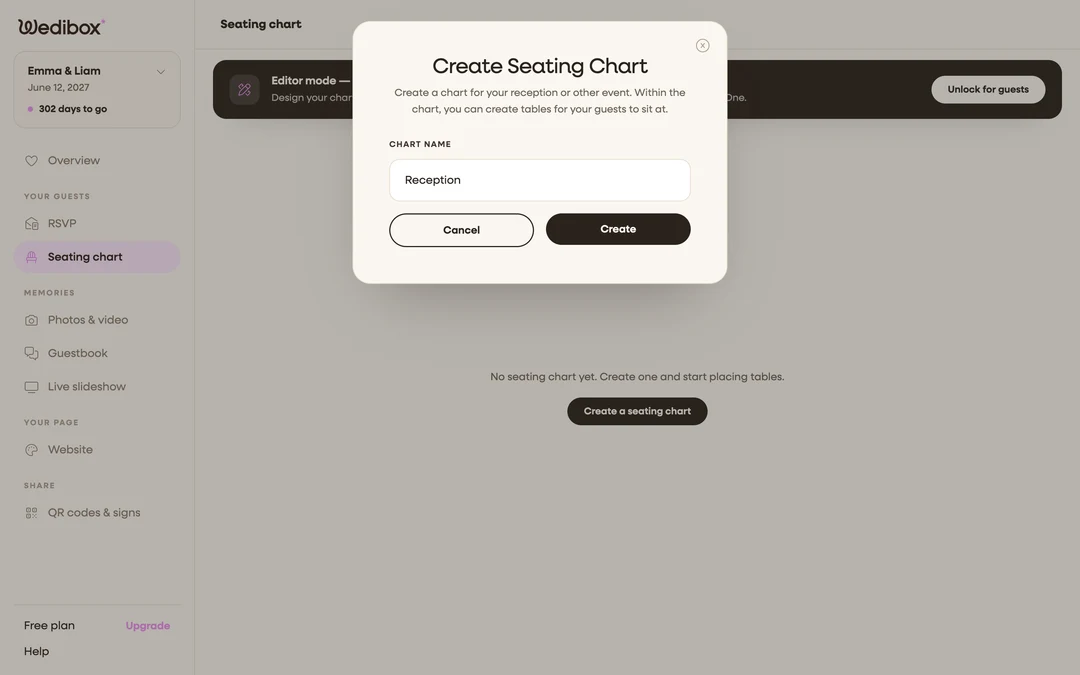
Create your first chart. Click Create a seating chart, type a name under CHART NAME (for example “Reception”), and click Create. One chart covers one room. You can add more later for a rehearsal dinner or a second space.
-
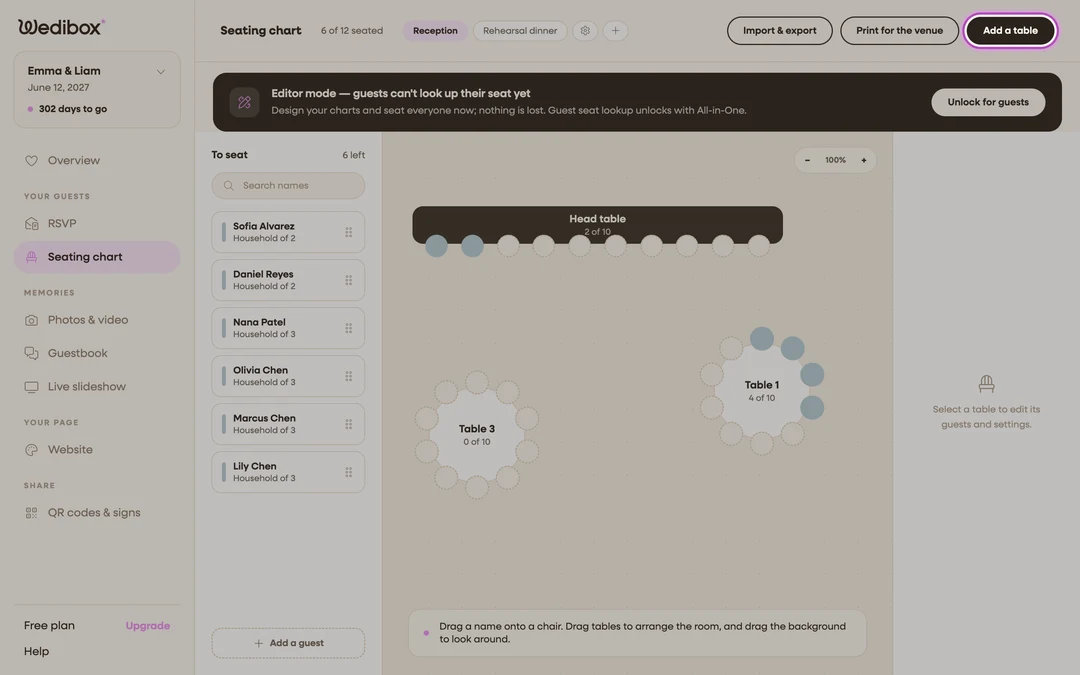
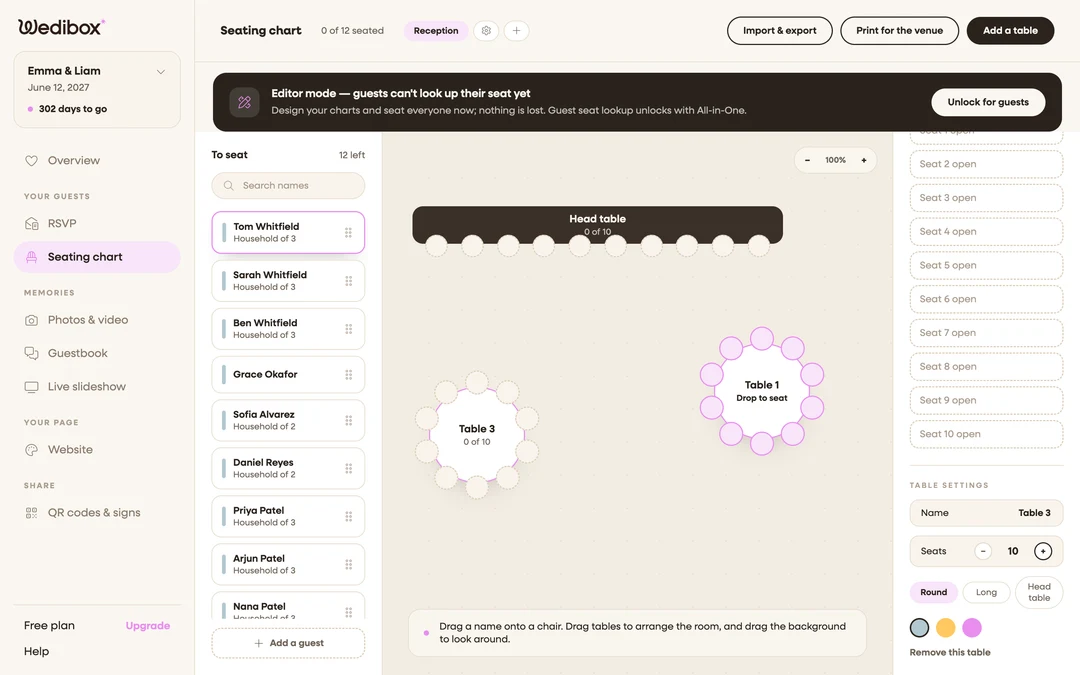
Add a table. Click Add a table in the top-right. A round table with 8 seats appears near the center of the canvas, already selected.
-
Shape the table. In the right-hand panel under Table settings, rename it, set Seats (up to 40), and pick a shape: Round, Long, or Head table. Repeat for every table in your room, dragging each one into position.
-
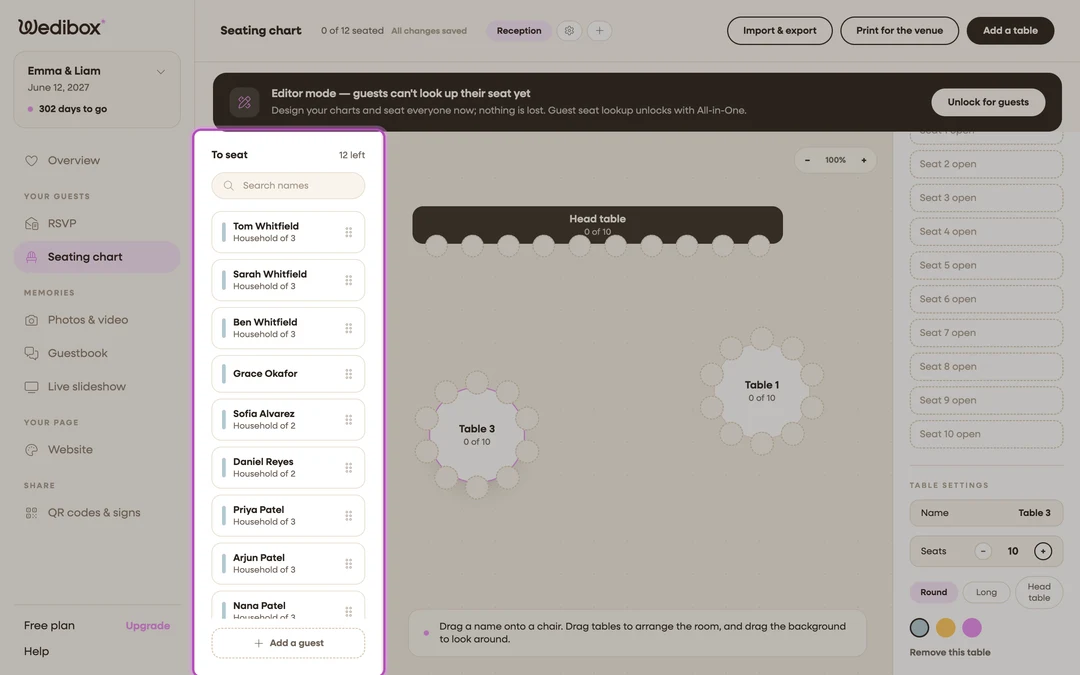
Add guests to seat. The To seat panel on the left lists everyone who still needs a chair. Click Add a guest to type in names quickly. Names added together count as one party, so couples and families stay side by side in your lists. You can also import a spreadsheet.
-
Seat people. Drag a name from To seat onto a chair. The chair fills with the table’s color, and the header count (“12 of 80 seated”) ticks up. Prefer clicking? Click any chair to pick a guest from a searchable list.
-
Let it save itself. There is no save button. Watch the header flip between “Saving” and “All changes saved” as you work.
What you should see
A floor plan that mirrors your venue, every chair either filled or intentionally open, and “All changes saved” in the header. When you’re ready, turn on guest seat lookup so guests can find their seat by name, and print a copy for the venue with Print for the venue.
If something goes wrong
- A guest is missing from To seat: they either declined (declined parties need no seats, so they’re hidden) or they’re already seated. Search the canvas or check their RSVP status.
- A toast says the table “is full. Add more seats or pick another table.”: raise that table’s Seats count in Table settings, or drop the guest elsewhere.
- The banner says “Editor mode” and guests can’t look up their seat yet: chart building is free, but guest lookup unlocks with All-in-One. Click Unlock for guests when you’re ready.