How to activate your event
Plans & billingAll plans
Activating is how you move off the Free plan: you pick a package, choose the date your upload window starts, and pay once. Everything you’ve already built (your page, photos, settings) carries over untouched. You can activate months before the wedding without losing any time, because your clock starts on the activation date you choose, not the day you pay.
Plan: All plans · Where: Overview → lifecycle banner, or the event menu → Plan and billing
Before you start
- Decide between Wedding and All-in-One first. See Wedibox plans compared. Upgrading later is possible; downgrading is not.
- Know your wedding date. The app recommends starting your upload window on it.
- Have any promo code ready. Codes are entered at the payment step behind the Have a code? link.
Steps
-
Open your event’s Overview. In the sidebar, click Overview. On the Free plan a banner shows how many of your 50 uploads are used.
-
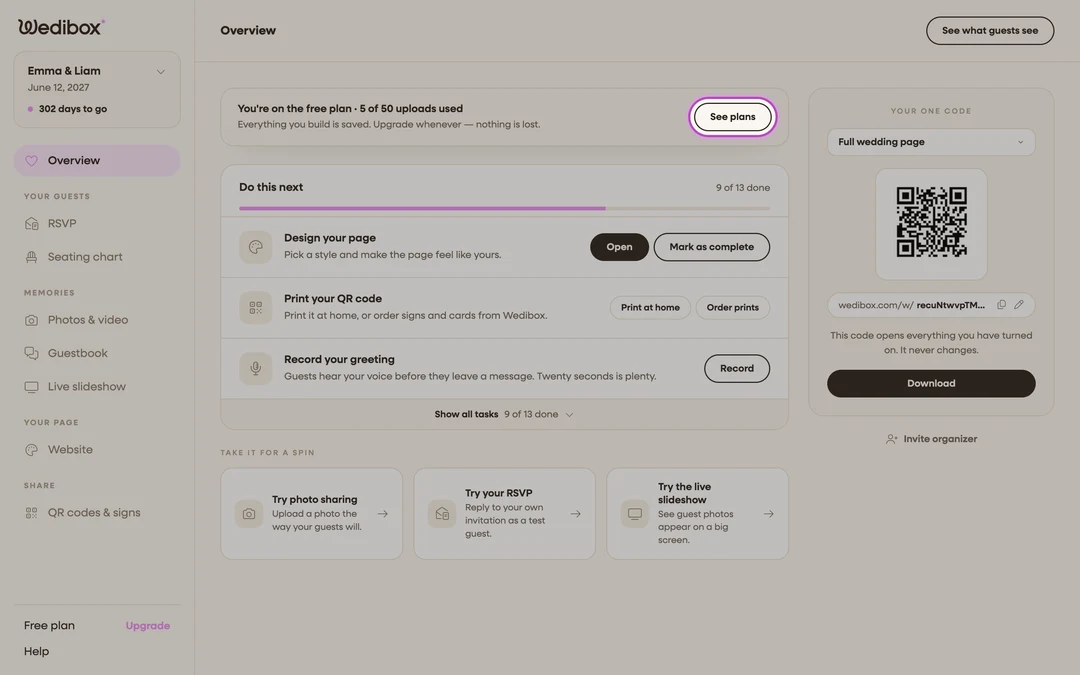
Open the plan picker. Click See plans on the banner. You can also click Upgrade at the bottom of the sidebar, or click your event’s name at the top of the sidebar and choose Plan and billing. The Pick your plan window opens.
-
Choose your plan. Click Choose Wedding or Choose All-In-One. Each paid card states its storage: “Stored and downloadable for 1 year” on Wedding, “for 2 years” on All-In-One, and All-In-One carries the Most chosen badge. Below the cards you’ll see the reassurances that apply to every purchase: at least a full year of storage, a 14-day money-back guarantee, and a one-time payment. If you opened the picker from a locked feature, the plan that unlocks it is ringed and marked Unlocks this.
-
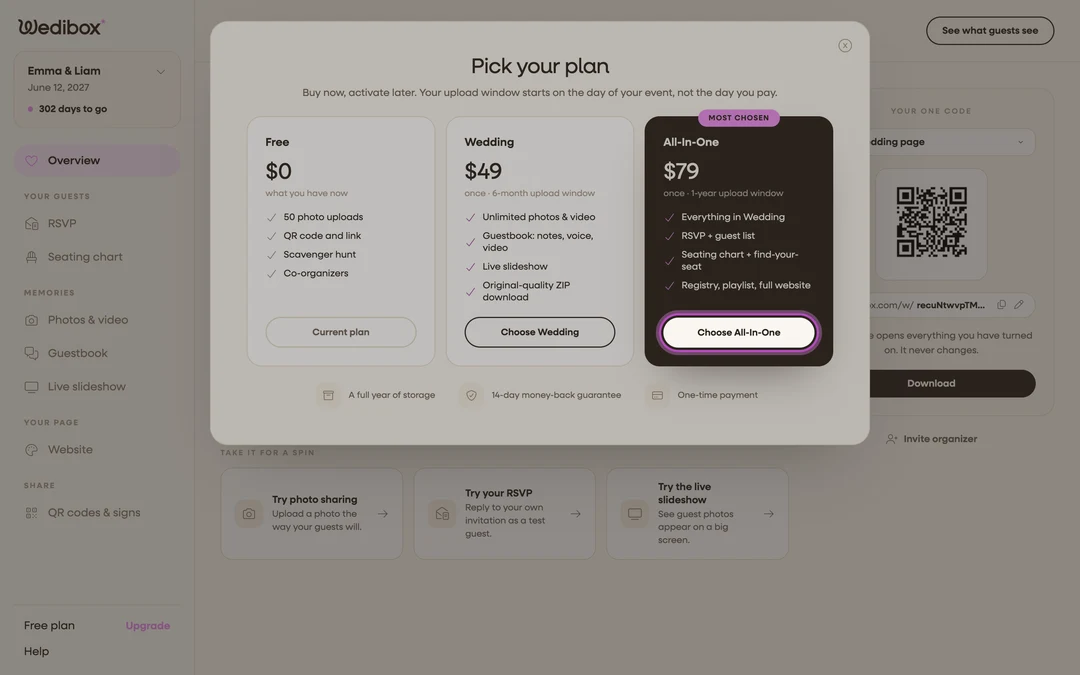
Pick your timing. When your wedding date is still ahead, the first option is Start on your wedding day, marked Recommended: uploads open on the wedding date and run for your full window while guests are there, not before. Below it, Activate Now opens uploads today, and Schedule for Later lets you pick your own date. Your page is already live either way. This only controls when guests can start uploading.
-
Optional: change your currency. Use the Currency selector on this step: USD, EUR, GBP, CAD, AUD, MXN, INR, or TRY.
-
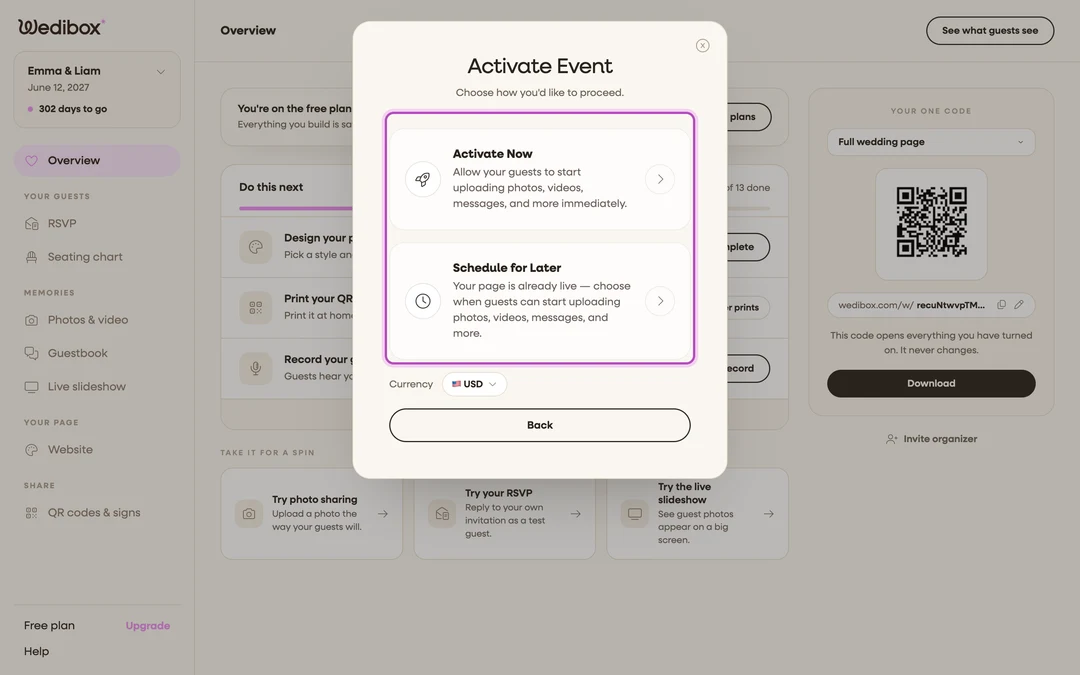
If you chose Schedule for Later: set the date. The Activation Date field is pre-filled with your wedding day; change it if you want uploads to open earlier, for example for the rehearsal dinner. A timeline preview shows exactly when your upload period and storage period will end. Click Next.
-
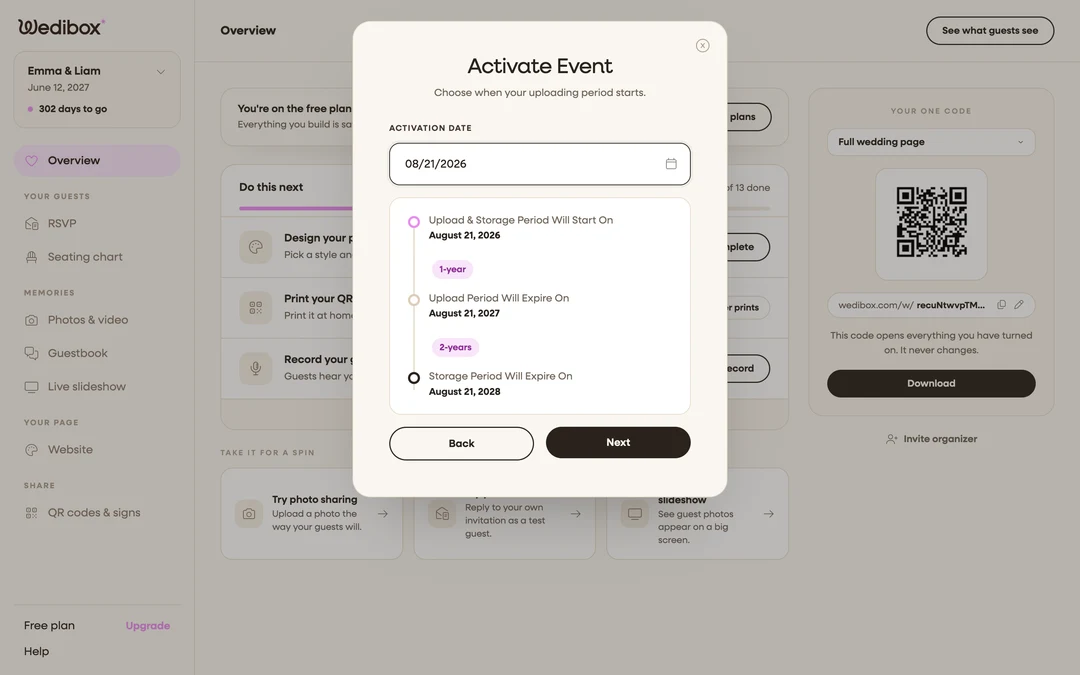
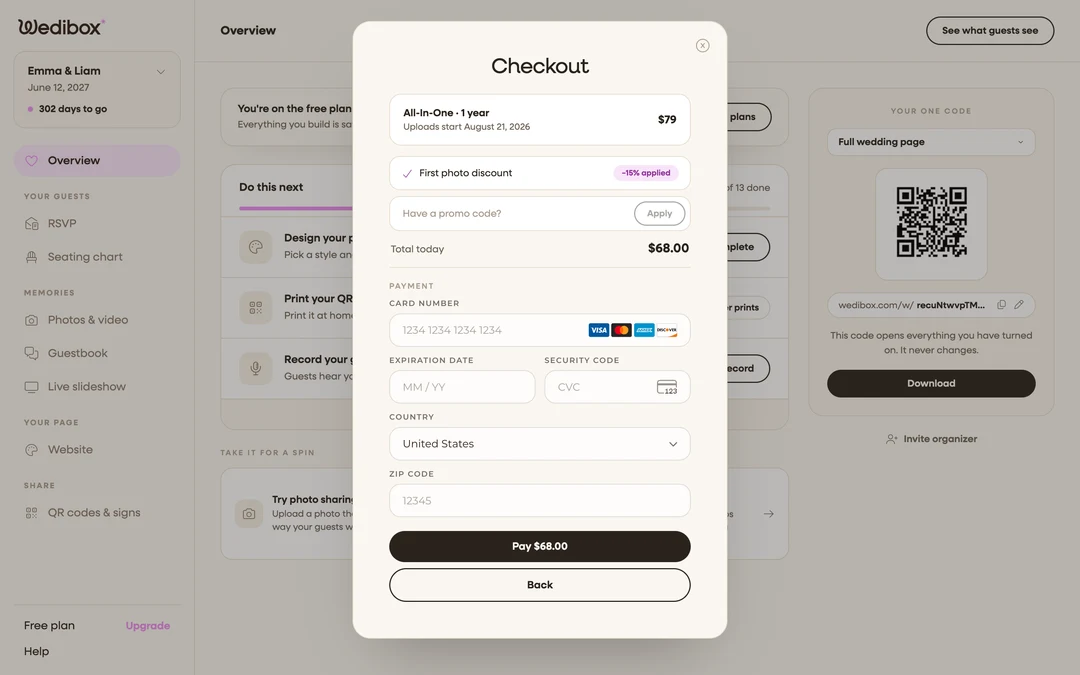
Review and pay. The Checkout step shows your plan with the exact dates it buys: “Uploads {start} to {end}” and “Stored and downloadable until {date}”, plus the one-time price. Enter your card details in the secure Stripe form. Below it, any earned discounts are applied automatically; to type a code, click Have a code?, enter it, and click Apply. Check Total today and click Pay. Under the button you’ll see the promise that applies to every purchase: “14-day money-back guarantee. One-time payment. No subscription.” To go back a step, use the arrow in the top-left of the window.
-
Finish activation. On the confirmation screen (“Thank you for upgrading your event!”), wait for the short countdown and click Finish Activation.

What you should see
Back on your Overview, the banner reflects your new state: Scheduled with “Uploads open {date}” if you picked a future date, or live immediately if you activated now. The event menu now shows Wedding plan or All-in-One plan under Plan and billing, and your plan’s features are unlocked: unlimited uploads, guestbook, and (on All-in-One) RSVP, seating, and the full website sections.
If something goes wrong
- Your card is declined or the payment form errors: the Stripe form shows the reason inline. Fix the details and click Pay again; you’re never charged twice for one activation.
- You picked the wrong activation date: while your event is still scheduled, you can change the date yourself from your event details. Once the event is live, contact support to move it.