How to add Wedibox to a WedSites website
Embed widgetEmbed widget
WedSites supports custom HTML sections, so the Wedibox widget can be embedded directly on your wedding website. Guests upload photos and browse the gallery without leaving your page.
Plan: Embed widget · Where: wedibox.com/w/embed/setup → select Wedsites
Before you start
- Have edit access to your WedSites site.
- The Free embed plan (up to 50 uploads) is enough to set up and test.
Steps
-
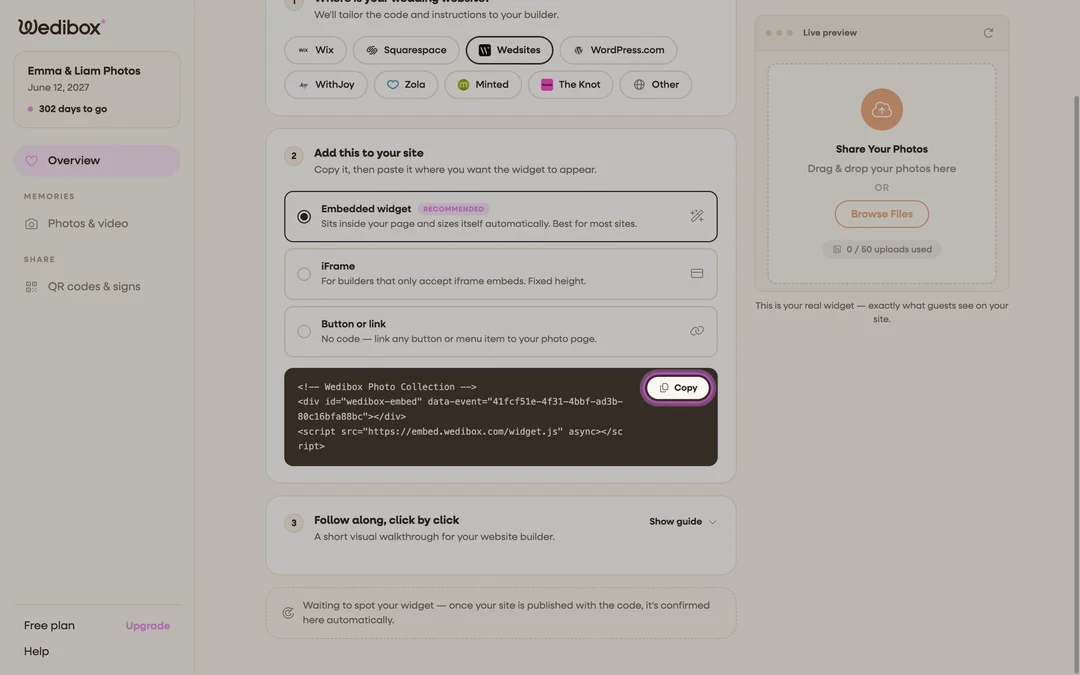
Get your embed code. Go to wedibox.com/w/embed/setup, select Wedsites, enter your event name and date, and create your free account. On the Add to Your Website step, keep Embedded widget selected and click Copy on the code box. A step-by-step WedSites walkthrough appears on the same screen.
-
Open the WedSites editor. Go to your wedding site and click Edit, then open the page where you want photo sharing.
-
Add an HTML section. Add a new section and choose the Custom HTML option.
-
Paste and save. Paste the Wedibox snippet into the section and save your changes.
-
Test it. Open your live WedSites page on your phone and do a test upload from the widget’s Share Your Photos button.

What you should see
The upload widget renders inside your WedSites page in your accent color, and it sizes itself to its container. Test uploads appear in the widget’s gallery and on your embed dashboard, and your site’s domain shows in the Overview tab’s Active Installations card after the first view.
If something goes wrong
- The section shows raw code. The section type isn’t Custom HTML. Recreate it with the Custom HTML option rather than a text section.
- The widget doesn’t load. Check that both lines of the snippet were pasted (the
divand thescriptline); some editors strip one of them on save. If scripts are blocked, use the iFrame version from the Wedibox code screen.