How to add a countdown to your wedding
Wedding websiteAll-in-One plan
A countdown gives your page a heartbeat: days, hours, minutes, and seconds ticking down to the moment you say I do. It’s the easiest section on the page; two fields, and one of them is optional.
Plan: All-in-One plan (build on any plan; visible to guests on All-in-One) · Where: Website editor → What is on your page → Countdown
Before you start
- Nothing to prepare; the countdown uses your wedding date automatically unless you point it somewhere else.
Steps
-
Open the Website editor. In the sidebar, click Website (under “Your page”).
-
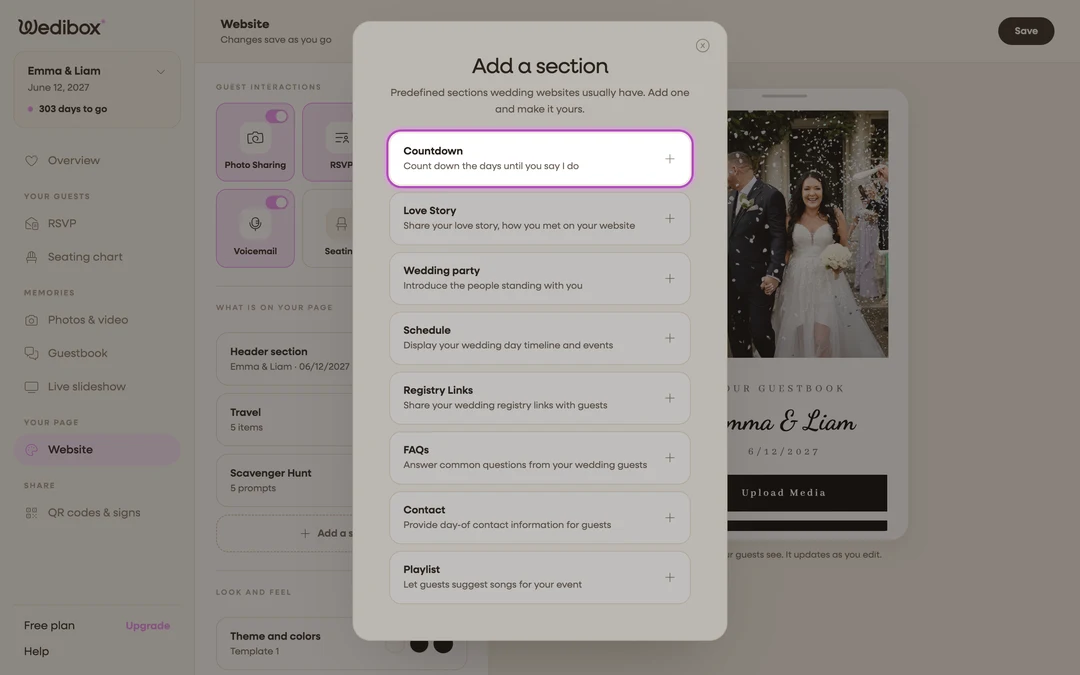
Add the section. Click Add a section and choose Countdown (“Count down the days until you say I do”). Its editor opens; if it’s already on your page, click its card; the status line reads “Counting down to the big day.”
-
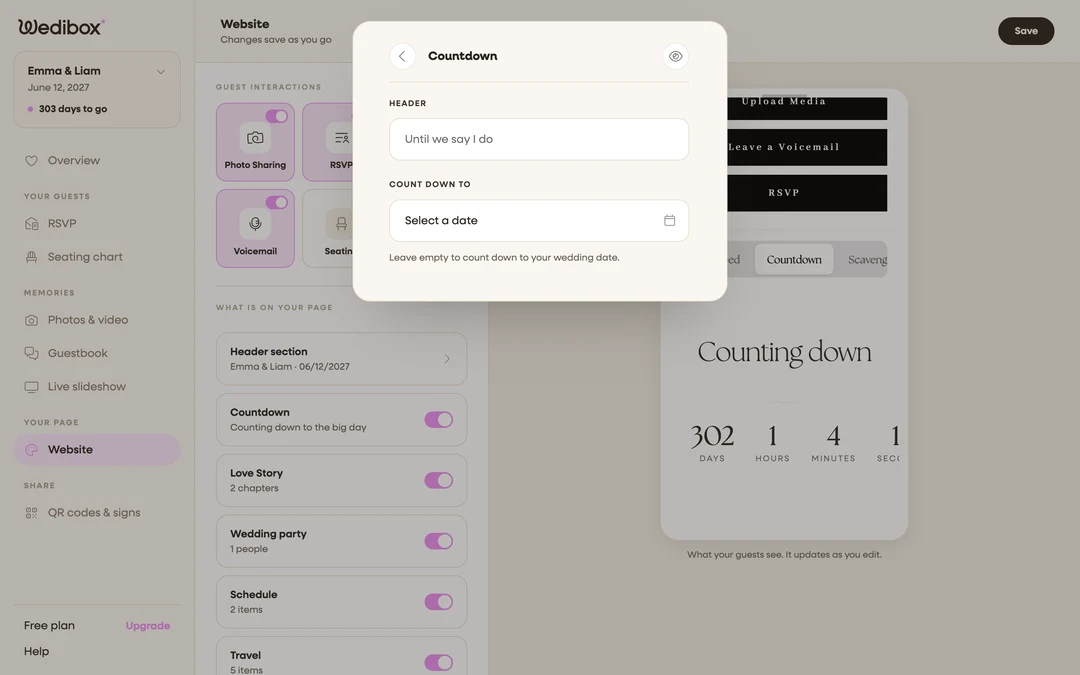
Give it a heading. The HEADER field suggests “Until we say I do”; keep it, or write your own.
-
Set the date; or don’t. The Count down to field takes any date, but as the hint says, leave it empty to count down to your wedding date. Set it manually only for a different moment, like the welcome party.
-
Close the editor to save. The preview now shows the ticking grid; Days, Hours, Minutes, Seconds.
-
Check the placement. The countdown sits in the upper stretch of your page, after your photo feed and scavenger hunt. Toggle it off any time with the switch on its card; the date is remembered.
What you should see
A live countdown ticking in the preview and on your page. After the date passes it swaps itself for “The big day is here”; no cleanup needed.
If something goes wrong
- The countdown shows the wrong day. You set a manual date earlier. Open the section and clear Count down to; it snaps back to your wedding date.
- It disappeared from the page. The section’s switch is off, or your wedding date has passed and it now shows the “big day” message instead of numbers.