How to order printed QR cards, table signs, and more
QR codes & printsWedding plan and up
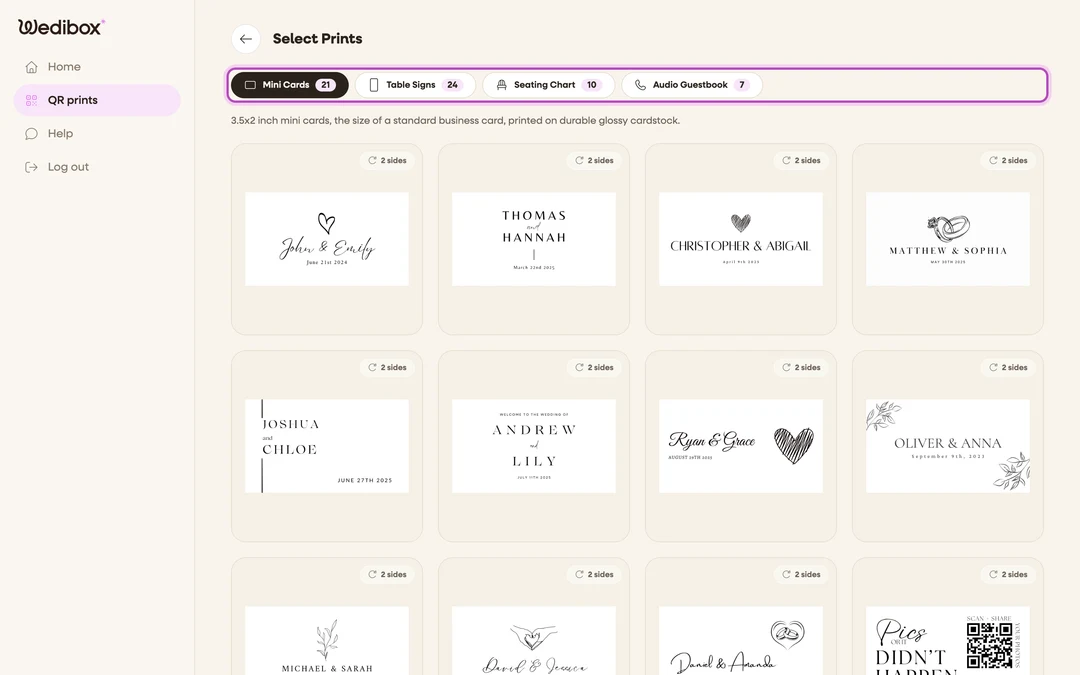
Wedibox prints your QR code on real cardstock so you don’t have to fight a home printer the week of the wedding. The catalog has five kinds of prints: Mini Cards (3.5×2 inch cards, the size of a standard business card, on durable glossy cardstock), Table Signs (5×7 inch signs on premium glossy cardstock), Seating Chart signs, Audio Guestbook signs that explain how to leave a voicemail, and Welcome Signs (18×24 inch) for the entrance. Your code and names are printed into the design; guests scan straight from the table or the door.
Plan: Wedding plan and up · Where: Sidebar → Share → QR codes & signs
Before you start
- Count your placements first: one sign per dinner table plus a couple of spares is the usual math for table signs; mini cards are for place settings, the bar, and gift table; one welcome sign at the entrance does the heavy lifting.
- Order at least two weeks before the wedding. The catalog shows an Order by date (your wedding date minus 14 days: 48 hours of printing plus shipping) and hides it once that date has passed.
Steps
-
Open the print catalog. In the sidebar, click QR codes & signs (under “Share”). The Select Prints page lists every design, with tabs for Mini Cards, Table Signs, Seating Chart, Audio Guestbook, and Welcome Signs. A banner at the top reads “Free shipping on your first order”, shows your order-by date, and quotes the starting price for the tab you’re on (“From $30”, for example). Designs marked 2 sides are printed front and back.
-
Click a design you like. The ordering popup opens with that design selected. You can also browse designs inside the popup with the arrow buttons and click Select.
-
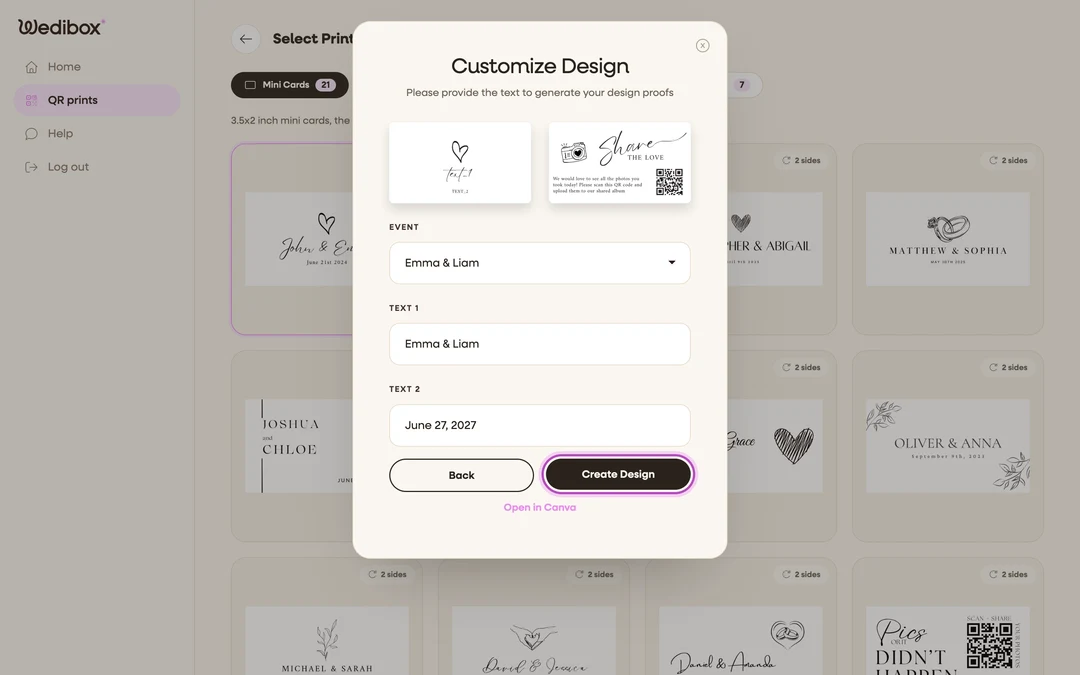
Fill in your text. On the Customize Design step, pick your event under Event and fill the text lines (Text 1, Text 2, Text 3, typically your names and date). Then click Create Design. Wedibox renders a proof with your real QR code in place. Some designs open in Canva instead. See How to customize your print design.
-
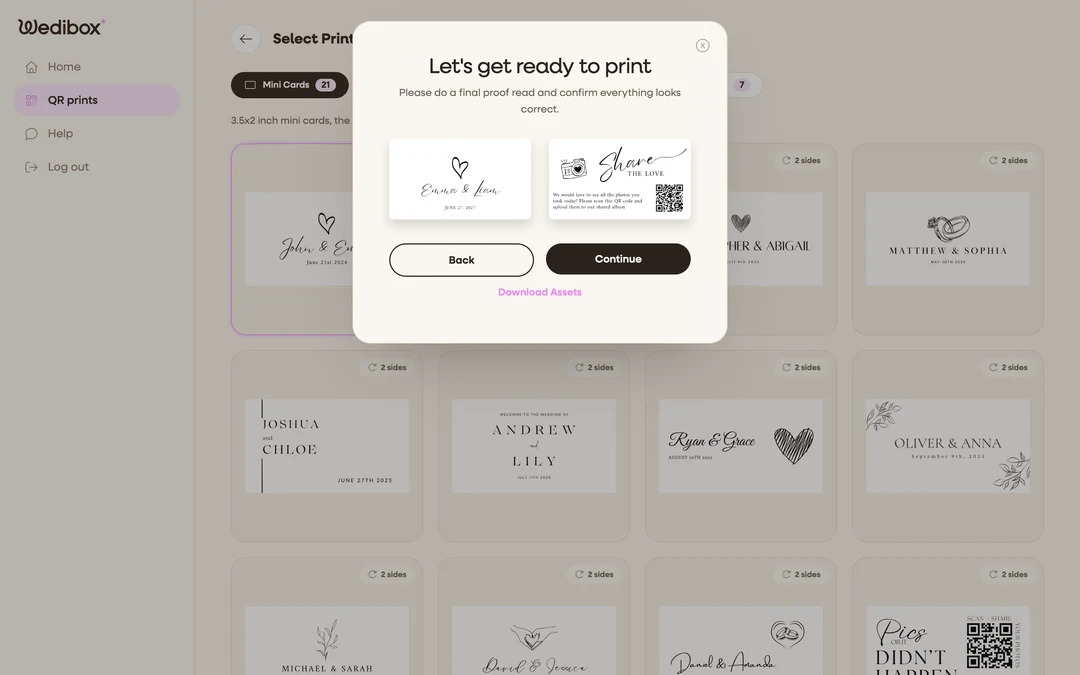
Proofread and approve. The “Let’s get ready to print” step shows your finished front (and back, for two-sided designs) and repeats your order-by date. Read every word: what you approve is what gets printed. Click Continue to approve, or use the arrow in the top-left of the window to go back and fix the text.
-
Pick quantity and currency. On the Select Quantity step, choose your Currency and click the Quantity option you want (each shows its price). Prefer to print at home? The Print at home: free download button on this step saves the print-ready files instead; see How to print your QR code yourself.
-
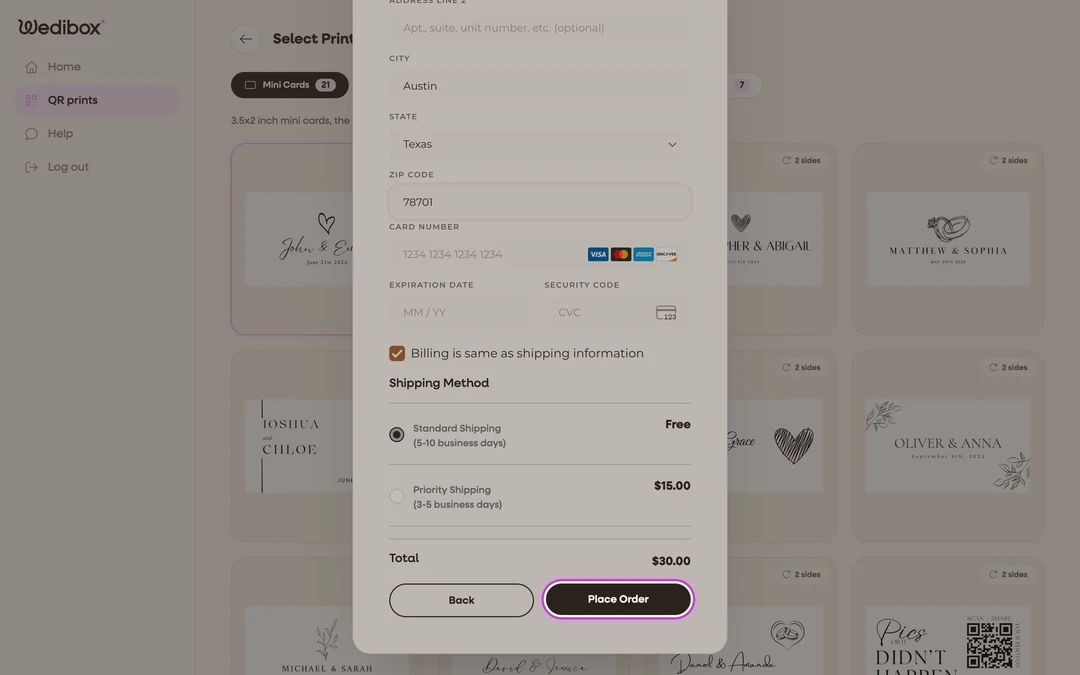
Check out. Enter your shipping address and card details, then choose a Shipping Method. See Shipping options and tracking for the speeds; standard US shipping is included at no charge. Orders ship within 48 hours of purchase. Click Place Order to finish. Payment is secured by Stripe.

What you should see
An order confirmation, and a new Orders item in the sidebar where your order appears with its status and estimated delivery. From there you can track the shipment all the way to your door, or to your venue, if that’s the address you entered.
If something goes wrong
- You spotted a typo after approving: if the order shows Requires Action in Orders, you can still finish or redo the design setup. If it’s already processing, contact support right away through Help in the sidebar.
- You’d rather print at home: every generated design can be downloaded instead. See How to print your QR code yourself.