How to use the partner marketing kit
For partnersPartner program
The marketing kit turns your code into things you can actually hand out: two ready-to-send emails, social posts in feed and story sizes, a print-ready flyer with your QR code, and a badge for your website. Set your branding once and every asset is generated with your logo, color, and code already in place.
Plan: Partner program · Where: Partner portal → Marketing kit
Steps
-
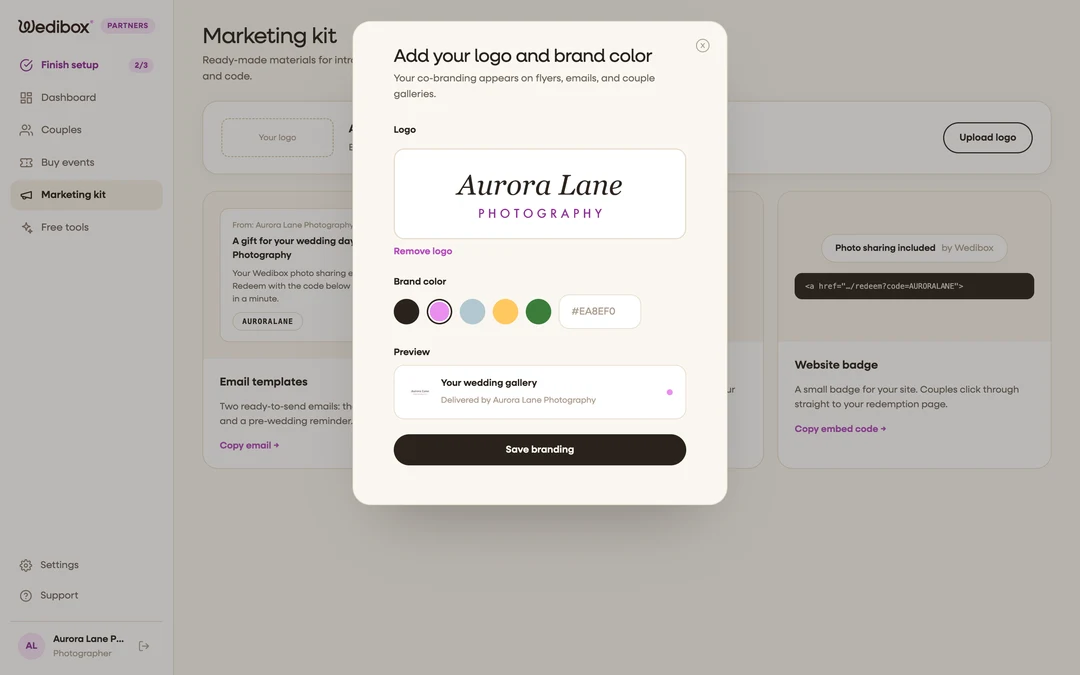
Add your logo and brand color. Click Upload logo in the banner (or Edit branding later). Drop in a PNG or SVG (transparent background works best), pick one of the preset brand colors or type your own hex code, check the mini preview, and click Save branding.
-
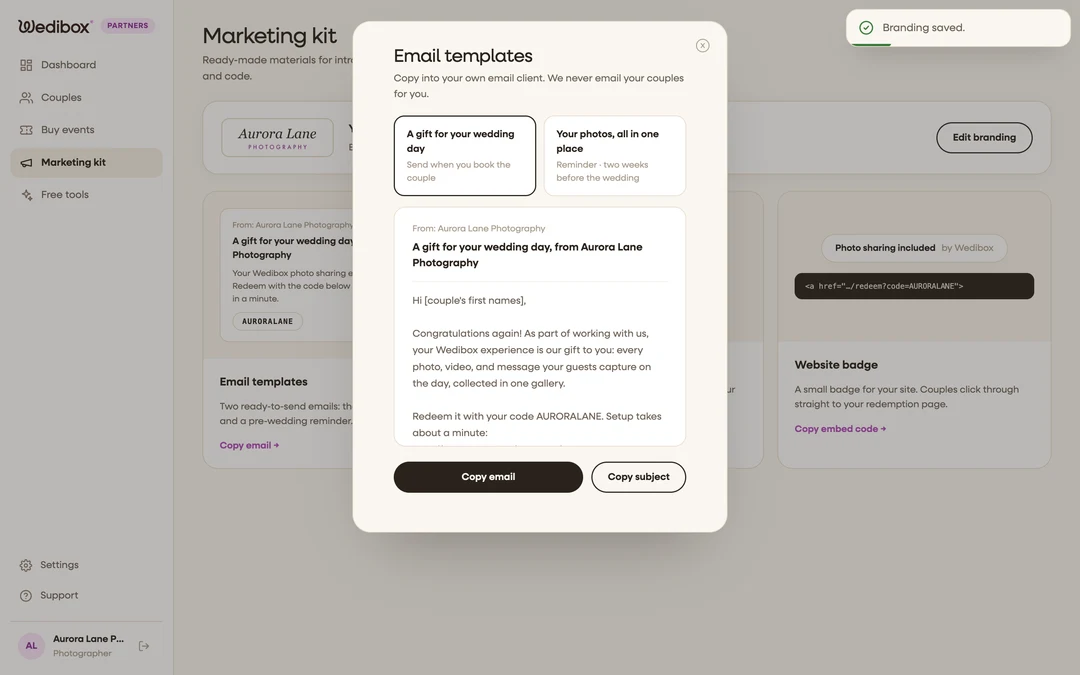
Copy the ready-made emails. Open Email templates. There are two: “A gift for your wedding day” (send when you book the couple) and “Your photos, all in one place” (a reminder for two weeks before the wedding). Use Copy email and Copy subject, then paste into your own email client; Wedibox never emails your couples for you.
-
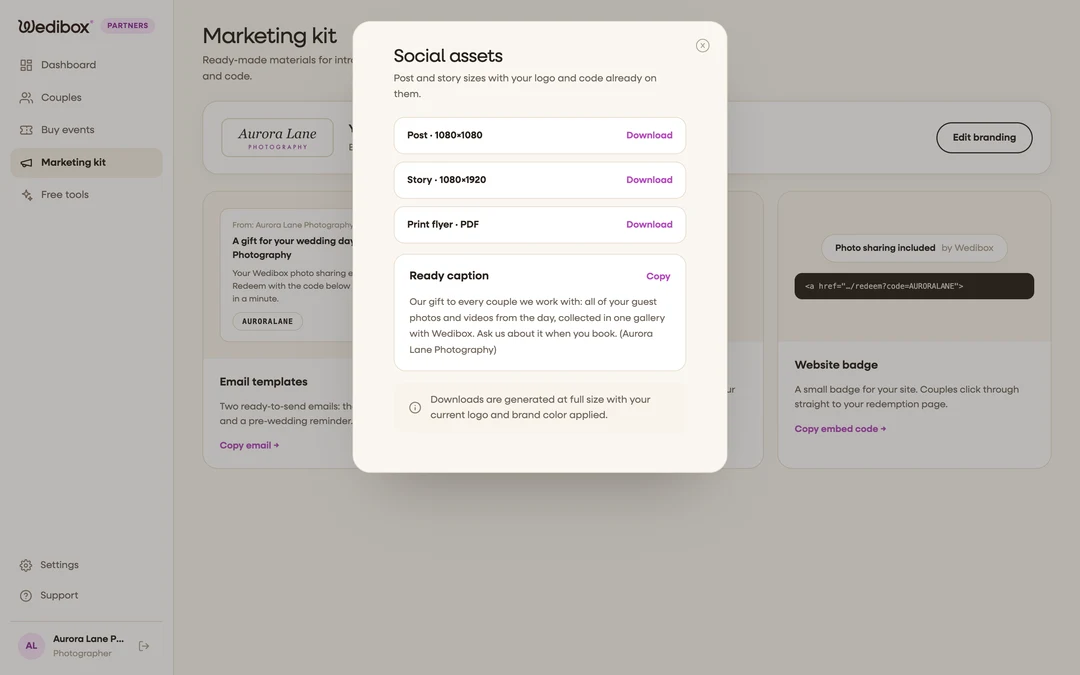
Download the social assets and flyer. Open Social assets and click Download on any of the three: Post (1080×1080), Story (1080×1920), or the Print flyer (a US-Letter PDF at print quality). Each is generated on the spot with your current branding, so give it a few seconds. A ready-written caption sits below with its own Copy button.
-
Print or post them. The flyer carries your code and a QR that opens your redemption page; it belongs in your welcome packets, your studio, or your venue’s front desk. The post and story announce the gift with your logo and code baked in.
-
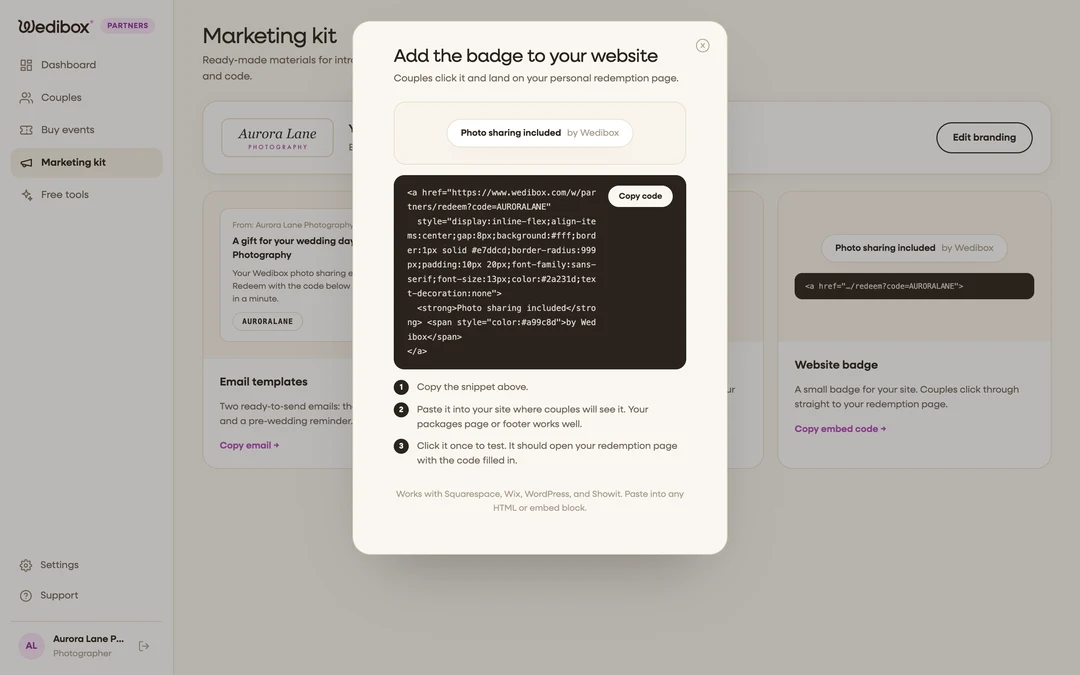
Put the badge on your website. Open Website badge, click Copy code, and paste the snippet into any HTML or embed block on your site (Squarespace, Wix, WordPress, and Showit all take it). Couples who click it land on your redemption page with the code filled in; click it once yourself to test.
What you should see
Every download and preview shows your logo and color, and everything points at the same place: your personal redemption page. Uploading a logo also completes the first Finish setup step.
If something goes wrong
- “Save your branding first, then download.” You picked a logo but didn’t click Save branding; save, then generate the asset again.
- “Downloaded, but we couldn’t embed your logo.” The flyer fell back to your business name in text. Re-upload the logo (JPG, PNG, or WebP) and try again.
- The logo looks fuzzy on the flyer. Upload a larger source file; the flyer is generated at print resolution and enlarges whatever you give it.