How to create your Wedibox event
Getting startedAll plans
Creating an event gives you a wedding page, a QR code, and a dashboard, free with no card. The whole flow is two names, a style, an account, and a short wizard that sets up exactly the features you want guests to use.
Plan: All plans · Where: wedibox.com/w/get-started
Before you start
- Have both first names and (ideally) your wedding date. The date is optional and you can change everything later.
- If you’ll sign up with Google, know which Google account you want the event tied to.
Steps
-
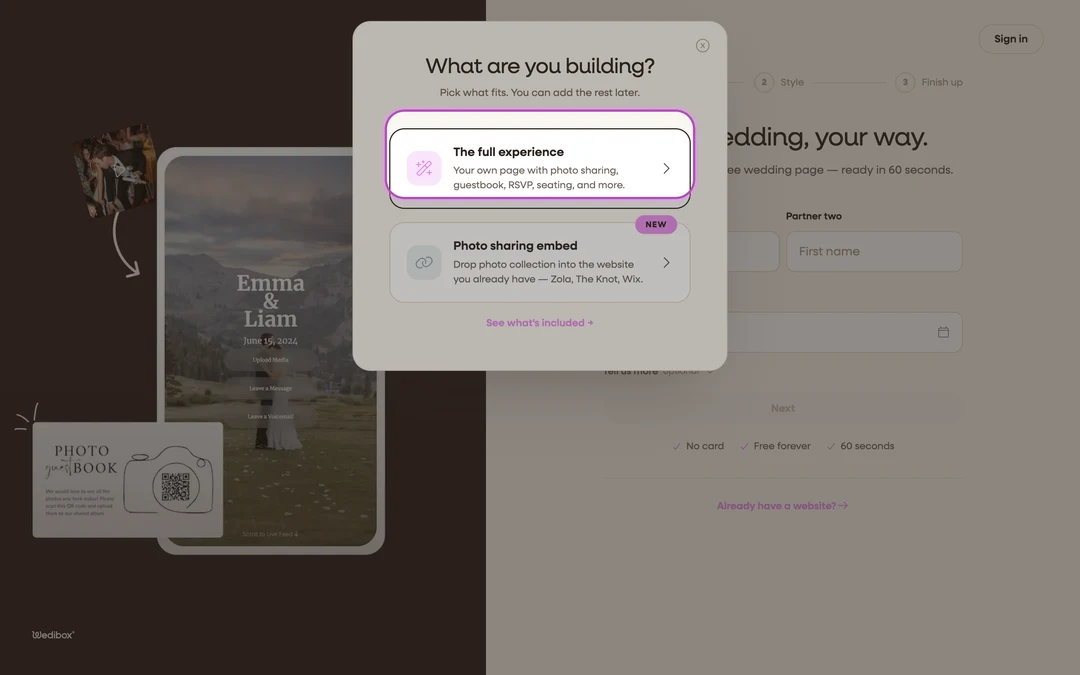
Open the signup flow. Go to wedibox.com/w/get-started (any “get started” button on wedibox.com lands here). A chooser titled What are you building? may appear. Pick The full experience. Only pick Photo sharing embed if you’re keeping a website you already have on Zola, Wix, or The Knot.
-
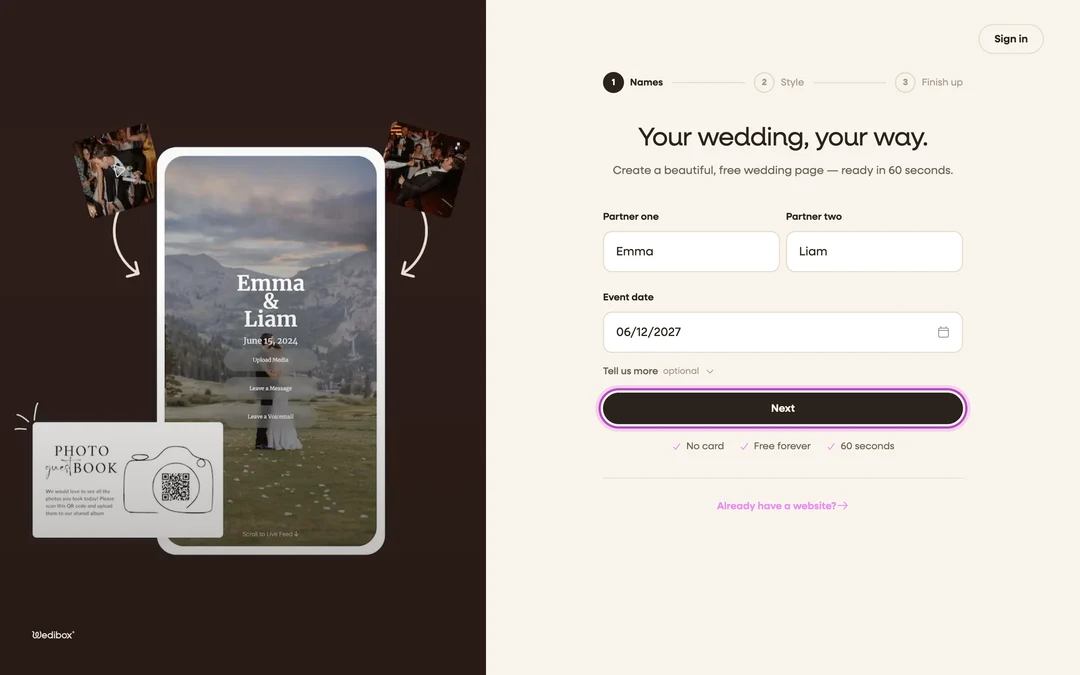
Enter your names and date. Fill in Partner one, Partner two, and Event date, then click Next. The date is optional. Tell us more is an optional extra: wedding type and how you plan to use Wedibox.
-
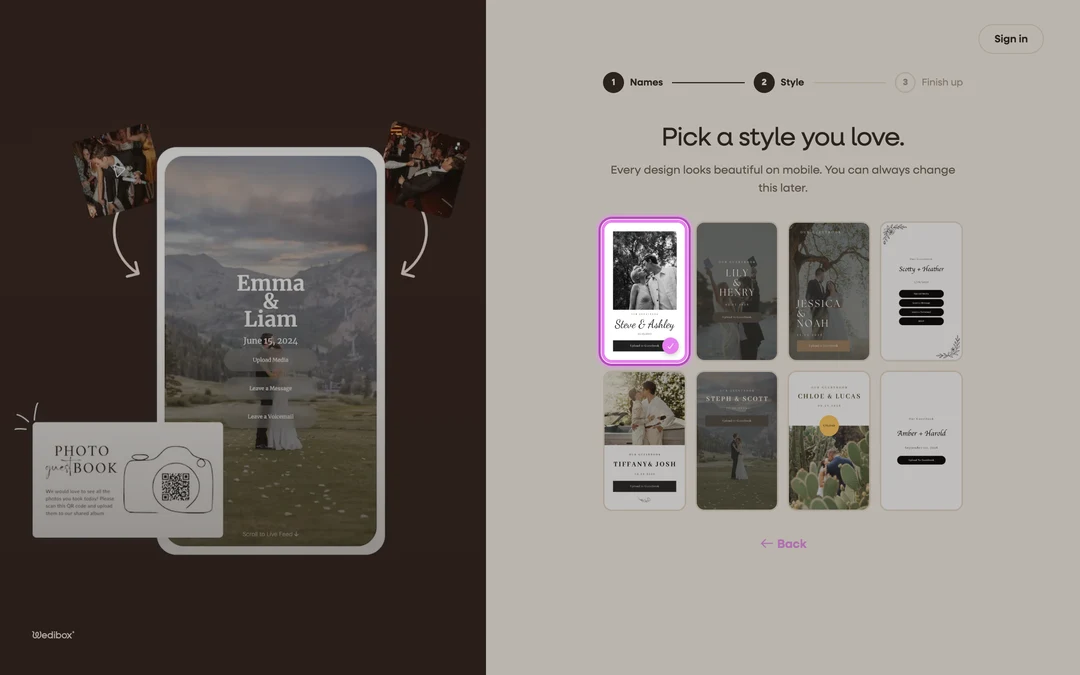
Pick a style you love. Click any style card. Clicking it is the choice, and the next screen opens on its own. Every design works on mobile, and you can change it anytime in the website editor.
-
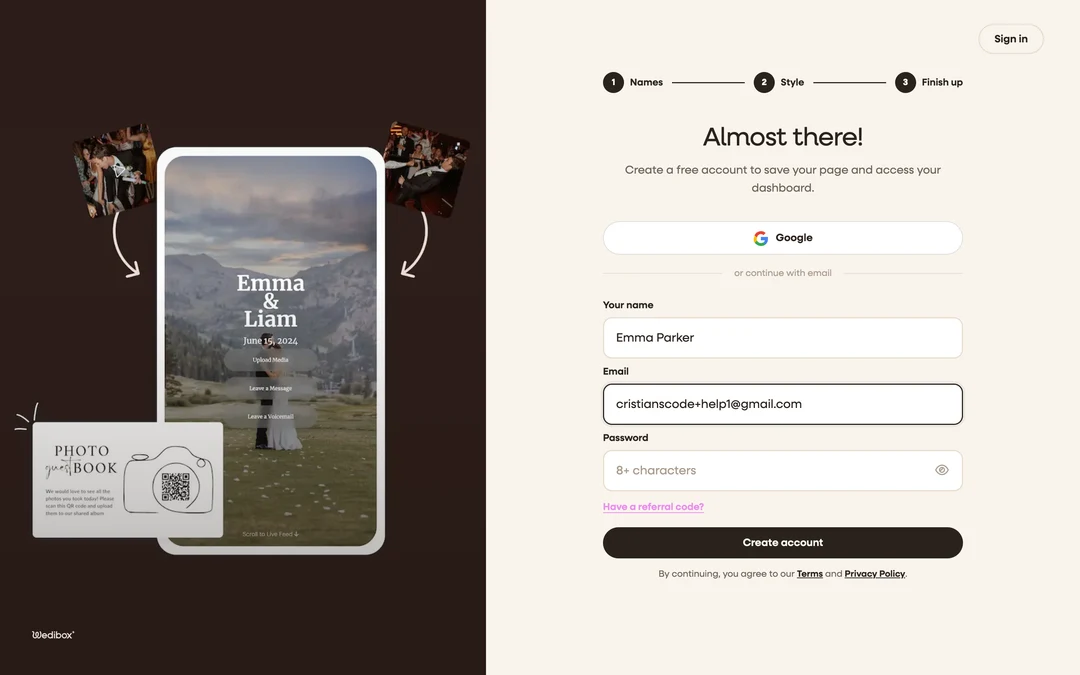
Create your account. Sign up with Google, or enter Your name, Email, and Password and click Create account. There’s a Have a referral code? link if a friend sent you one. Your page is created the moment your account is.
-
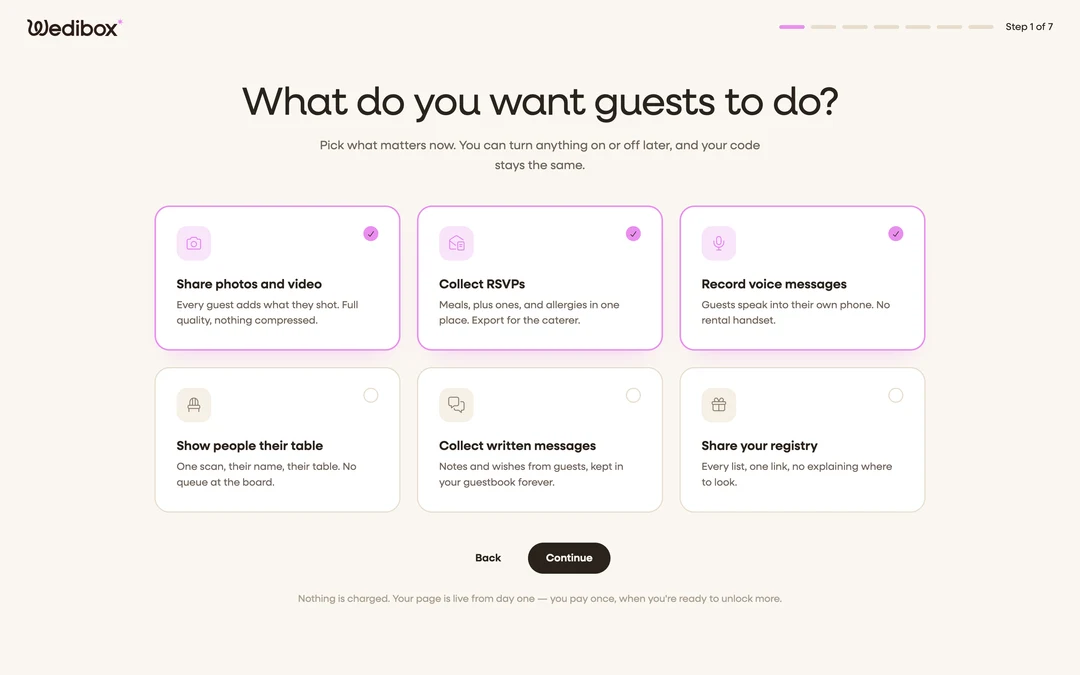
Choose what guests can do. The setup wizard opens on What do you want guests to do? Toggle the cards (Share photos and video, Collect RSVPs, Record voice messages, Show people their table, Collect written messages, Share your registry), then click Continue. Nothing is final; your QR code stays the same no matter what you turn on later.
-
Answer the quick choices. Short questions like who can see guest uploads and whether guests can post anonymously. Each answer here is one less task on your checklist later.
-
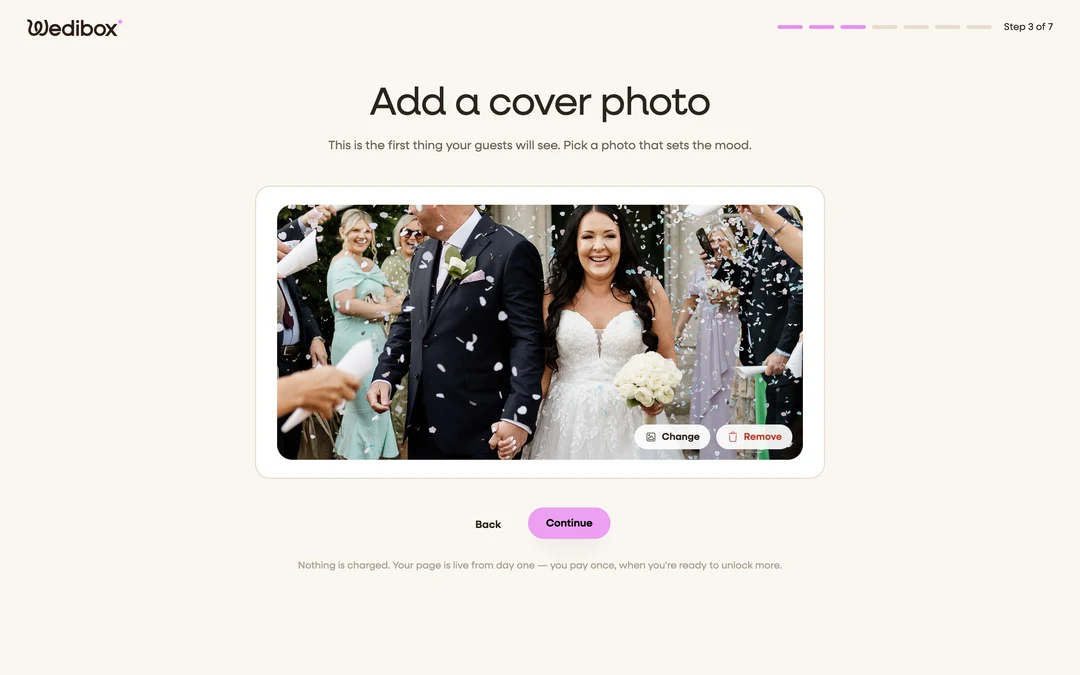
Add a cover photo. Click Click to upload a photo, or pick one of the sample photos to start with. This becomes the top of your page.
-
Finish the walkthrough. The remaining screens match what you picked: photo albums, your RSVP form, registry links, website sections (choose Set it up now or I’ll do it later), and an optional co-organizer invite. Click Finish on the last screen. Everything saves at once.


What you should see
You land on your event’s Overview: a greeting with your countdown, a Do this next checklist, and your QR code in the right rail, ready to download. Click See what guests see to open your live page.

If something goes wrong
- “Could not save your choices. Please try again.” Your connection dropped during the wizard. Your account and event exist; log in and finish from the Overview checklist.
- You closed the tab mid-wizard. Nothing is lost. Go to wedibox.com/w/auth/login, open your event, and the Do this next checklist covers the same setup.